-
The forum has been upgraded to support both light and dark themes. Click here for directions.
You are using an out of date browser. It may not display this or other websites correctly.
You should upgrade or use an alternative browser.
You should upgrade or use an alternative browser.
Octagon blind builds!
- Thread starter ditty22
- Start date

Mennoniteman
Well-Known Member
Looks great! But that's not your hunting spot is it? Not many guys hunting on blacktop. Are you planning to move it fully assembled?
Tim
New Member
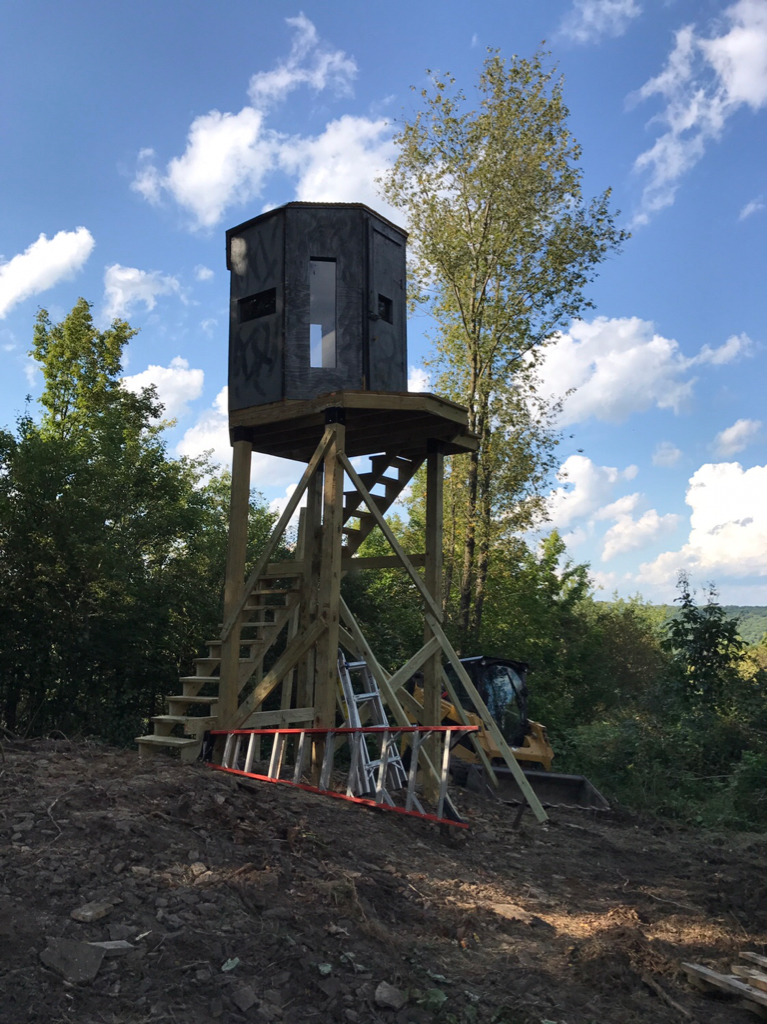
I went easy on the hardware for a simple tear down. I'm going to finish the steps and mock up a railing. Its going to its final destination this weekend. I will post some pictures after its all up. This is my fist blind build and plan on taking my kids out in it. I guess I just wanted to make sure I didn't overlook anything.


Mennoniteman
Well-Known Member
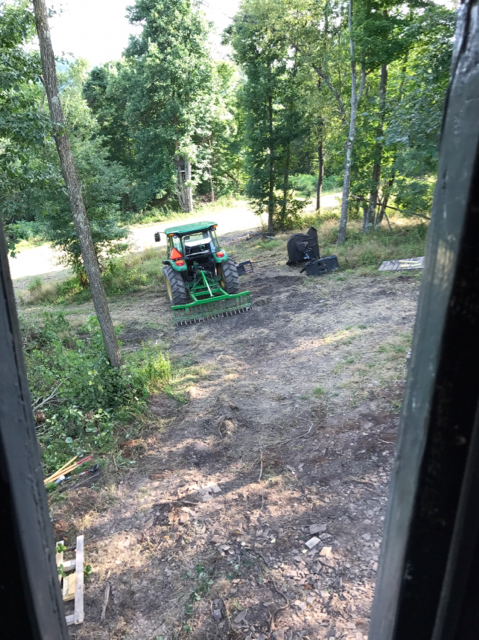
Can you give us some inside pictures?View attachment 7595 View attachment 7596
View attachment 7595 View attachment 7596 View attachment 7599 View attachment 7600 View attachment 7601 Finally got it up today. Still have a few things left to do. But here she is in her new home.
Tim
New Member
Thank You! The roof is plywood wrapped in tar paper with roof roll. I also wrapped the edges and put a coat of paint on it. It has a 2" grade. I pre-made this to check for leaks, worked great. The outside walls have 2 coats of paint inside and out. I then I wrapped them with digital Gore-tex camo. I haven't taken the paper off the windows yet. I promised my son he could do it, but he wasn't around when i put it up. This is the first blind I ever built and I'm really happy with the finished product. Will post some final pictures when I finish the railing and seal the inside and put carpet down.


Mennoniteman
Well-Known Member
The cost of an elevated box hunting blind is a huge variable depending on what you use and where you get it. Go to the lumberyard for everything, or scrounge around the neighborhood for leftovers? Tin roof is cheap, rubber is quiet, if you can get scraps it might be free. Prefinished smartside 4x8 siding is $46 a sheet, osb is $12 and coat it with leftover roofing pitch. I often get carpenters aluminum ladders that won't pass OSHA inspection anymore, for scrap price. Screw and strap them tight so they don't rattle. Buy tinted windows for $50 ea. Or get tinted Plexiglas and some grooved vinyl slides to make windows. Or just take square window panes and a notched wooden slide strip top and bottom to make a free window. Back to your question, I can build a very nice hunting blind for $300-$500. Or a budget model for a hundred.How much you guys think you have into these blinds? I built a box blind last year but want to make a one to two more and octagon blinds are so nice for the bow and gun
Mennoniteman
Well-Known Member
Here's an Octagon Treestand project I completed the other day, had one of my carpenters build two of these for me in the shop, this is going to be one of the the nicest stands I have. It's 6' in Diameter, 6' wall height, 7' to peak, 14' from ground to floor, 4x4 posts, tinted Plexiglas windows, extended height archery window, Smartside siding, rubber roof, and residential doorknob situated at a gap in a fencerow in the middle of a four acre field. The materials cost about a $1000, mostly in siding, windows and vinyl window slides. The easiest way to build one of these; construct it in the shop fully finished, then take the roof off, wall & floor panels apart again, then put it together in panels on site. First set up the posts on an exactly level site with the bracing, anchor with steel fencepost and screws at each post, set the floor on in one pc off of a 10' high stepladder, install permanent ladder, install eight wall panels, install roof, caulk seams in siding, go hunting.How much you guys think you have into these blinds? I built a box blind last year but want to make a one to two more and octagon blinds are so nice for the bow and gun

Chainsaw
Well-Known Member
Here's an Octagon Treestand project I completed the other day, had one of my carpenters build two of these for me in the shop, this is going to be one of the the nicest stands I have. It's 6' in Diameter, 6' wall height, 7' to peak, 14' from ground to floor, 4x4 posts, tinted Plexiglas windows, extended height archery window, Smartside siding, rubber roof, and residential doorknob situated at a gap in a fencerow in the middle of a four acre field. The materials cost about a $1000, mostly in siding, windows and vinyl window slides. The easiest way to build one of these; construct it in the shop fully finished, then take the roof off, wall & floor panels apart again, then put it together in panels on site. First set up the posts on an exactly level site with the bracing, anchor with steel fencepost and screws at each post, set the floor on in one pc off of a 10' high stepladder, install permanent ladder, install eight wall panels, install roof, caulk seams in siding, go hunting.View attachment 8033
Those are all great looking tower blind builds shown on this thread so far and they would complement any property. Each is umpteen times better than any I have even attempted to construct. I get to see a lot of blinds up close due to the many woods walks I do with the Cornell MFO program and do have a couple of thoughts to consider though for adding more anchor strength and safeness to the setup. I had these thoughts while admiring the very pretty and precision built blind built by Mennoniteman's guys and these thoughts may apply to one or two of the others as well depending possible extreme weather in various locations
Here we expect up to 70 plus MPH winds every year or two and sustained winds of 40 MPH at least once a season so we tend to think that too anchored is not possible. If here I'd add the system used by Red Neck Blinds to add anchor strength to their setup which is in addition to the thirty inch or so rebar that holds each leg in place. They use an eye bolt in the middle of the exterior floor frame which is cable attached to 2 1/2 to 3 ft. ground screws planted in cement if the ground is too rocky to screw them in. Due to our extreme winds here I opted for their suggestion of three cables and three ground screws for maximum strength. I'd be happy with the legs on more angle so it covered a larger foot print as well. Remember, I'm not an engineer so am always looking for maximum hold down power versus enough and have seen a few beautifully built blinds not so anchored that have been blown over. Where most of you all are you may not get to "enjoy" winds so fierce but here along Lake Ontario the freezing winds are guaranteed each fall. Tower blinds falling over here is fairly common so Overkill in anchoring a tower blind may be just right.
Also as one gets just a little older it can be precarious to open or close the door without an exterior platform. It would is especially difficult at the end of the day in the dark on one of those late in the season blow days here that add a bunch of blowing snow and ice to the equation.
I don't add these comments to be critical, merely passing on what I've seen others do that might save someone from having a tower blind blown over.
Mennoniteman
Well-Known Member
My leg anchors are actually engineered connections. Being a contractor I have resources that most people don't. I had mentioned the steel fence post at each leg, driven until it won't go down anymore, 36" to 48" depending on the tightness of the shale, with a shank on the bottom to prevent removal, screwed to the bottom of each post with 2-5/16x4 structural screws has a safety factor of about five in 90 mph wind load. It will take a tornado to blow it over and won't be needing any additional uplift protection. And if you noticed, there's a bag of concrete on the bottom of each post for insurance. Going to all the expense and effort of doing a nice stand it would be foolish not to anchor it properly.Those are all great looking tower blind builds shown on this thread so far and they would complement any property. Each is umpteen times better than any I have even attempted to construct. I get to see a lot of blinds up close due to the many woods walks I do with the Cornell MFO program and do have a couple of thoughts to consider though for adding more anchor strength and safeness to the setup. I had these thoughts while admiring the very pretty and precision built blind built by Mennoniteman's guys and these thoughts may apply to one or two of the others as well depending possible extreme weather in various locations
Here we expect up to 70 plus MPH winds every year or two and sustained winds of 40 MPH at least once a season so we tend to think that too anchored is not possible. If here I'd add the system used by Red Neck Blinds to add anchor strength to their setup which is in addition to the thirty inch or so rebar that holds each leg in place. They use an eye bolt in the middle of the exterior floor frame which is cable attached to 2 1/2 to 3 ft. ground screws planted in cement if the ground is too rocky to screw them in. Due to our extreme winds here I opted for their suggestion of three cables and three ground screws for maximum strength. I'd be happy with the legs on more angle so it covered a larger foot print as well. Remember, I'm not an engineer so am always looking for maximum hold down power versus enough and have seen a few beautifully built blinds not so anchored that have been blown over. Where most of you all are you may not get to "enjoy" winds so fierce but here along Lake Ontario the freezing winds are guaranteed each fall. Tower blinds falling over here is fairly common so Overkill in anchoring a tower blind may be just right.
Also as one gets just a little older it can be precarious to open or close the door without an exterior platform. It would is especially difficult at the end of the day in the dark on one of those late in the season blow days here that add a bunch of blowing snow and ice to the equation.
I don't add these comments to be critical, merely passing on what I've seen others do that might save someone from having a tower blind blown over.
Chainsaw
Well-Known Member
I should have figured you had covered that somehow as you must often build barns for high winds. Sounds excellent. Yes I did notice the cement. The shank on the bottom of the steel post is a great idea.My leg anchors are actually engineered connections. Being a contractor I have resources that most people don't. I had mentioned the steel fence post at each leg, driven until it won't go down anymore, 36" to 48" depending on the tightness of the shale, with a shank on the bottom to prevent removal, screwed to the bottom of each post with 2-5/16x4 structural screws has a safety factor of about five in 90 mph wind load. It will take a tornado to blow it over and won't be needing any additional uplift protection. And if you noticed, there's a bag of concrete on the bottom of each post for insurance. Going to all the expense and effort of doing a nice stand it would be foolish not to anchor it properly.
Mennoniteman
Well-Known Member
A steel fencepost will only work 3-4' deep in good tight dirt, needs a shank on the bottom, and has to be pounded in until it stops moving. In sand I would excavate (auger) a hole 3-4' deep and bury a 4x4 with a short 2x6 on the bottom to keep it from pulling out, bolt to base of treestand. This will be cheaper and easier than pouring concrete. In big rock I would drill a half inch hole in the rock and bolt a 1/4" steel L-shaped bracket to the rock with a thunder bolt. In smaller rock if you don't want to dig in anchors, pouring concrete is about the only option.I didn't have cement but I did drive fence post and it pulled them right out.What i had to do was set a 4x4 on the north and south side about 2ft up on the side set in cement.It couldn't get to moving so wasnt moving
Double L
Well-Known Member
I have made some drawings and changes to some planes I found online last year. Ill post what i have done so far. The original plans call for piecing the side panels together to save on material. I will use full 4X8 sheets for each side next time. Ill just use the side panels in drawings has my cut sheet on full pieces. The platform I will be starting to put up this week if rain holds off. I used Deer view windows from Texas. Nice stuff just order them way in advance.. Ill post the platform in next post. these are in PDF so look for the attachment. I hope this works. Never posted pdf before.
Attachments
-
 hut pic.jpg279.8 KB · Views: 0
 -
hut-Model-1.pdf13.4 KB · Views: 0
-
hut-Model-2.pdf6.5 KB · Views: 0
-
hut-Model-3.pdf6.7 KB · Views: 0
-
hut-Model-4.pdf9.9 KB · Views: 0
-
hut-Model-5.pdf10.3 KB · Views: 0
-
hut-Model-6.pdf7.2 KB · Views: 0
-
hut-Model-7.pdf12 KB · Views: 0
-
hut-Model-8.pdf10.4 KB · Views: 0
-
hut-Model-9.pdf13 KB · Views: 0
Double L
Well-Known Member
Mennoniteman
Well-Known Member
This is the platform
I'm waiting for pictures of it when you have it up.This is the platform
Double L
Well-Known Member
I'm waiting for pictures of it when you have it up.
Sent from my iPhone using Tapatalk
Mennoniteman
Well-Known Member
Hey, I love it! Being a carpenter I've built dozens of platforms and stairways like that and yours is right up there with the best of them, got a double flight steps, landing, porch, archery window and all. I'm sure you are going to add some stair railings for safety yet, those wooden steps get very dangerous with ice on them. I enjoy open air hunting, but hunting out of a well built, well located box blind in bad weather is also one of those special hunts that you look forward to all summer long.
Sent from my iPhone using Tapatalk
Similar threads
- Replies
- 19
- Views
- 5K