Loader Joystick Hydraulics question

yoderjac

Well-Known Member
I have an old B2400 with a belly mower that I used the the burbs for lawn care and snow removal. It has an aftermarket SMC 64 loader. The loader valve does not have float.

As I retire, I will have a concrete slab in front of the new garage (for my wife, it is a pickleball court). I had to play with the joystick for loader height adjustment on the fly since it doesn't have float, but I was not concerned about scratching the asphalt driveway. The new place will be cement and I'd like to be a bit more careful. I plan to get a clamp on type snow blade for the cutting edge of the bucket. It is only a couple hundred bucks. I'd still like to have a float function on the bucket.

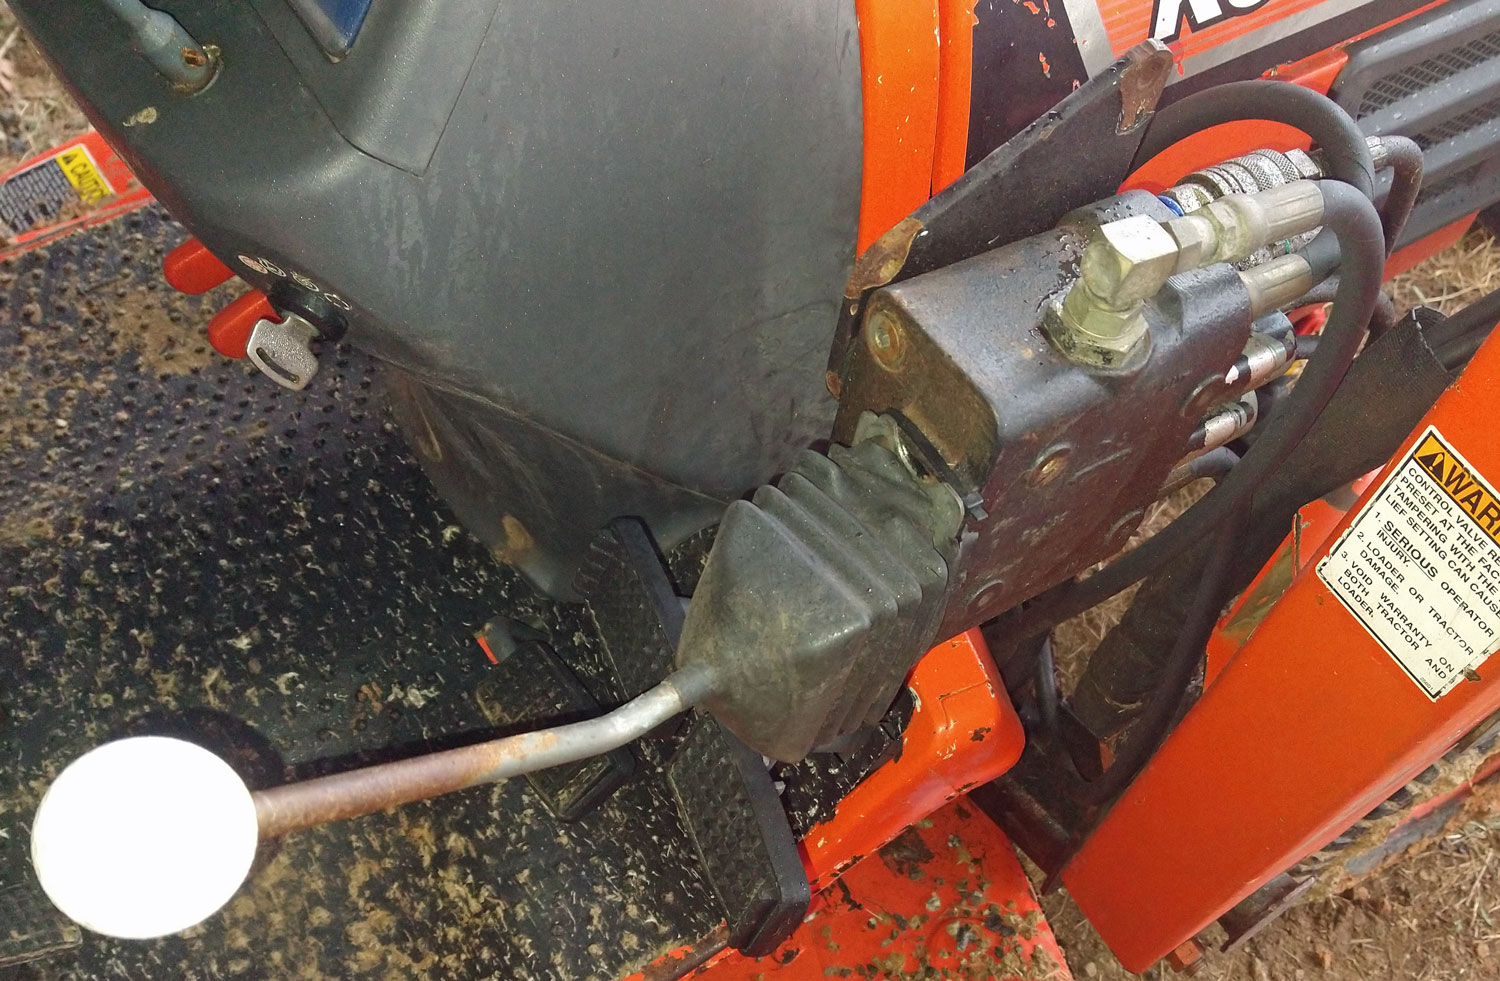
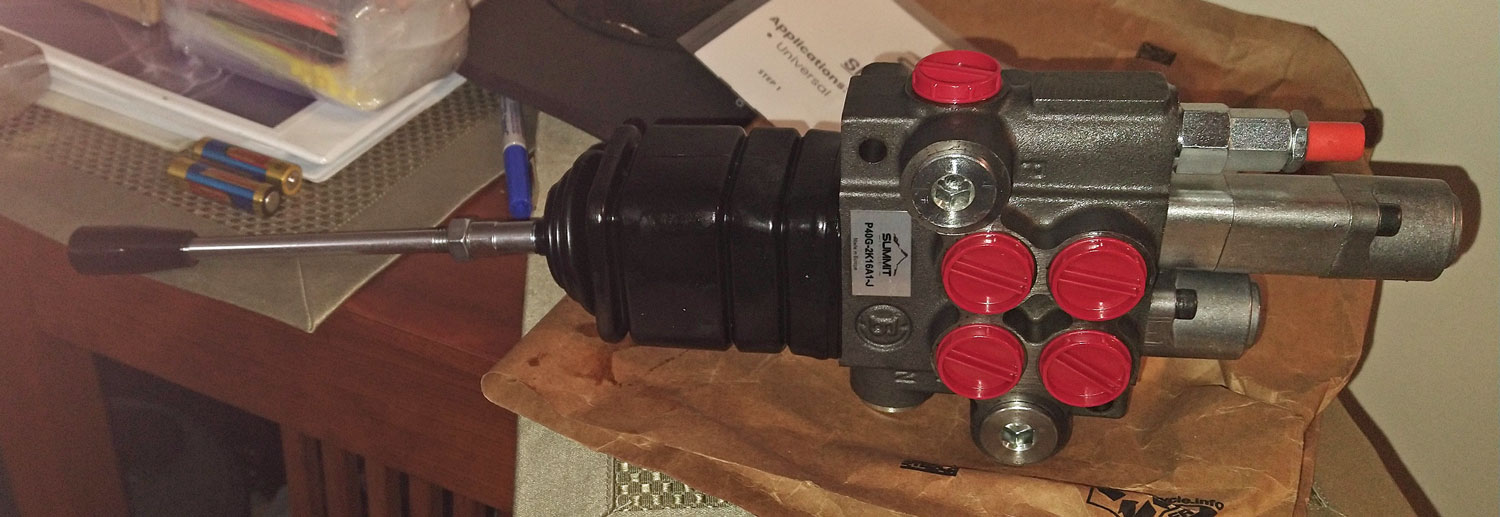
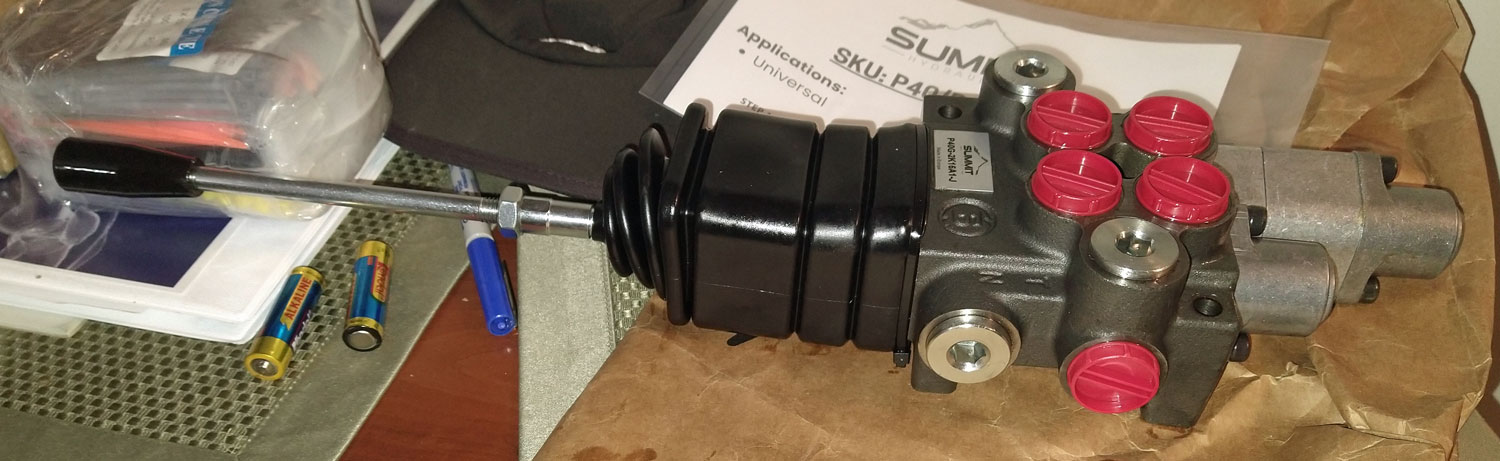
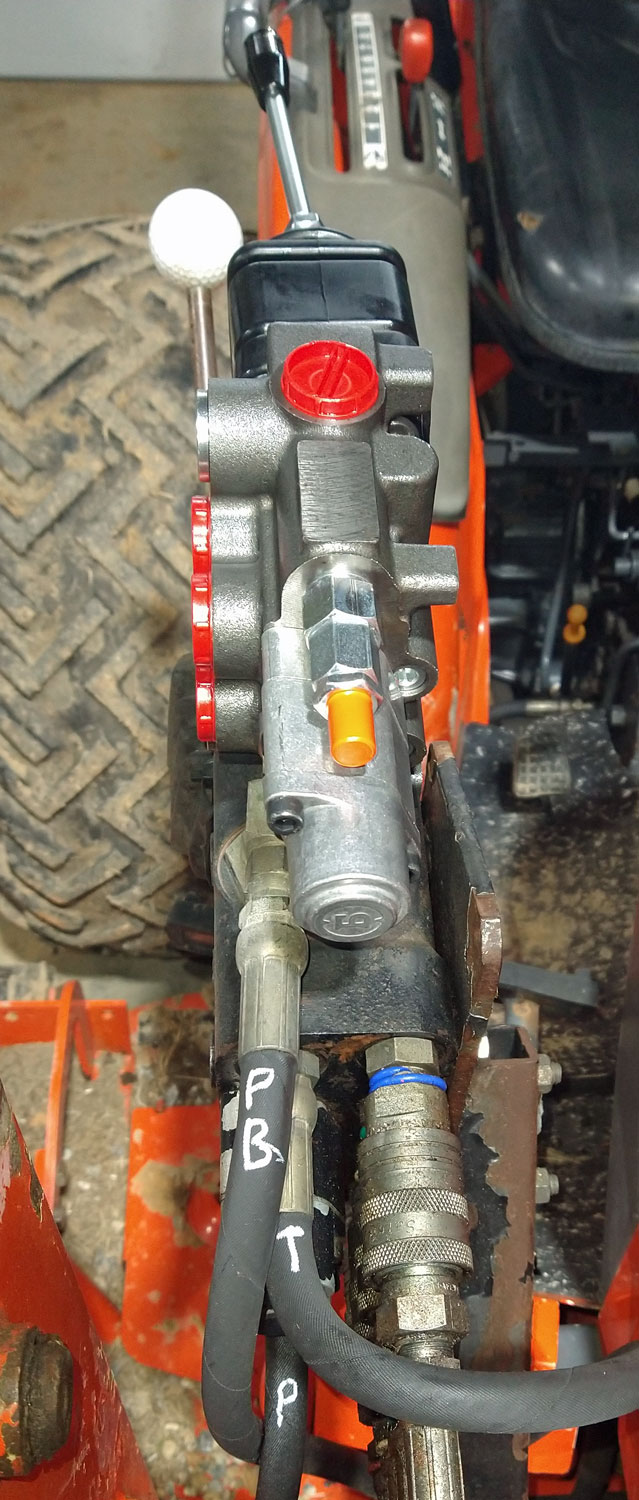
The loader joystick and valve are pretty old. The rubber sleeve is torn and sometimes the control sticks a bit. So I'm considering replacing it with one that has float. I am a novice when it comes to hydraulics. The B2400 has open center hydraulics. I'm looking at this valve with float: https://summit-hydraulics.com/produ...onal-control-valve-w-joystick-2-spool-11-gpm/

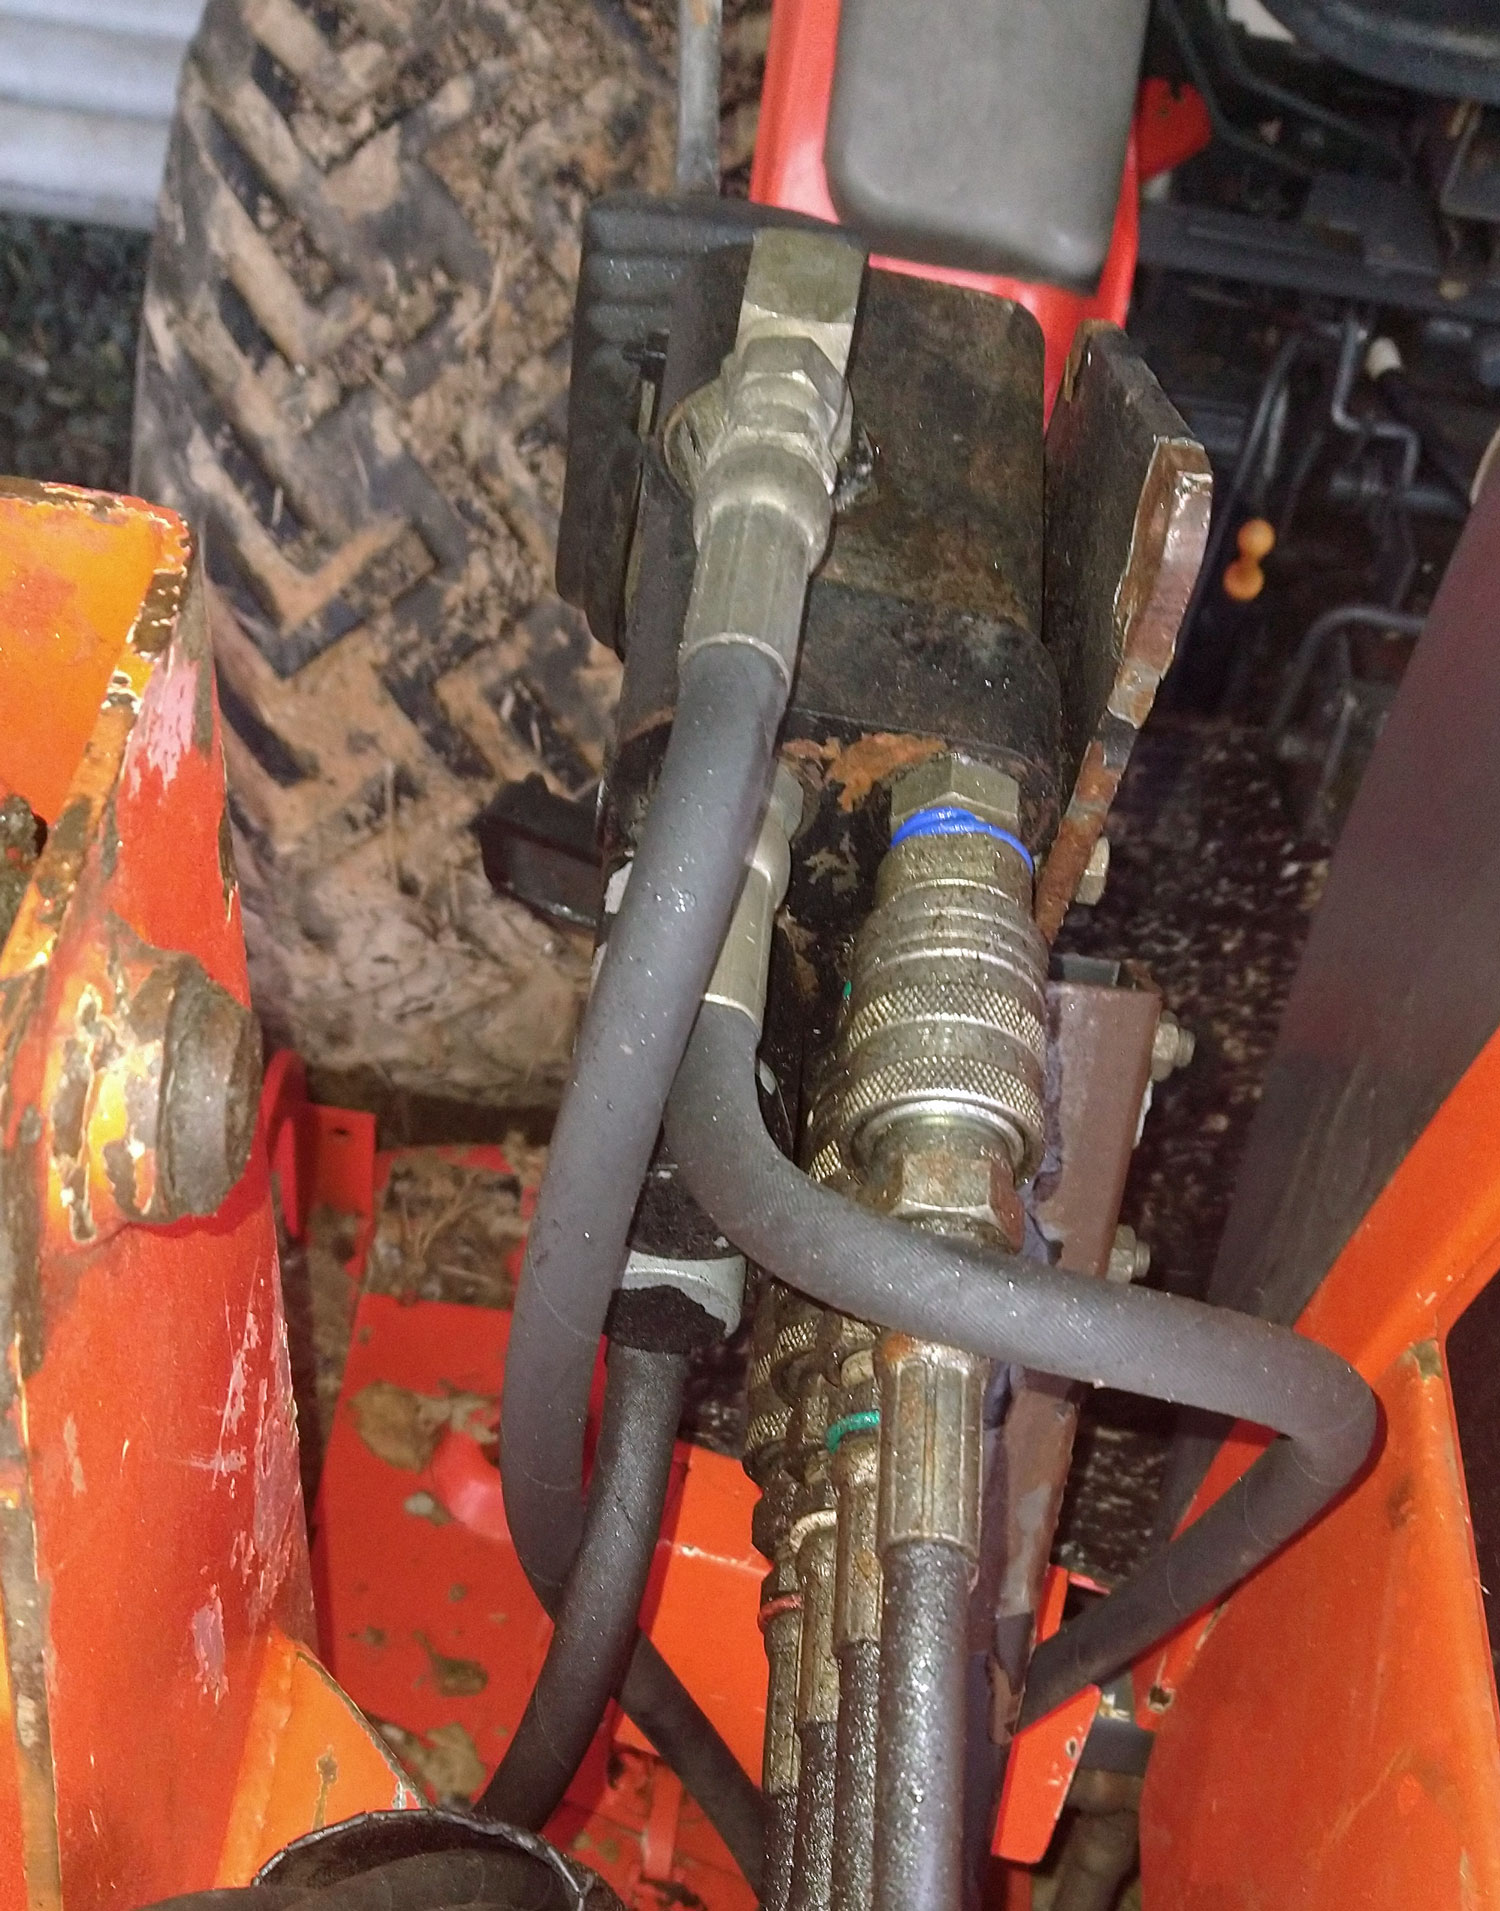
It has more flow than the B2400 can produce. I'm thinking it should be pretty much a one for one swap. I presume I can use the quick connects and adapters from the current valve. This one has a power beyond option, but for the life of me I can't think of a use for rear hydraulics on a tractor this small. Here is the clamp on snow blade I'm looking at: https://www.ratchetrake.com/

Before I put out the money for a new valve, I'd like you guys who know hydraulics inside and out to make sure I'm not doing anything stupid here or missing something. If anyone has used the snow edge I'd like to hear about that.

I'm in no rush as the garage and house have not yet been build let alone the pickleball court poured. It will be next winter before I'll actually use this. To be honest, I'm getting a knee replaced later this month and I'm also looking for a cure for cabin fever when I can hobble around but am not fully functional during the recovering period.

Thanks in advance!
 
I had hoped to get some feed by from some you your more experience equipment guys. I chatted with my neighbor who has a bit more familiarity with hydraulics than I do and he seemed to think it would work, so I placed the order today. I'll report back when it comes in.
 
The new valve has not yet come in, but here are a couple pictures of the one I'm trying to replace:

5b0e3023-bacc-4ac4-b860-c7787ce18335.jpg


0896f6bd-9880-4142-a97c-588b9a0dc3be.jpg
 
I wasn't sure if the power beyond adapter from the existing valve would work with the Summit. I emailed them. They gave me the threading of
#8 (1/2 – 14) G Thread (British Pipe Thread Parallel). I'm planning on making this a project to work on after my knee replacement. There is no indication in any documentation I can find what the threading is on the current valve for the SMC 64Q valve. I decided to be on the safe side, I'd order a new one. I placed that order today.
 
My knee replacement will be early next week, so I'm trying to get things ready to work on this project during my recovery. Today, I took the first step. I found some documentation on the current valve on line. From that, I was able to identify the primary lines and label them. I then set the new Summit valve on top of the current valve and took a picture:

f5dc4ded-c2fe-4160-b95b-1a4ab5581b4c.jpg


You can see the labels PB (Power Beyond), P (Pump), and T (Tank) labels on the lines. The other lines are work lines. There is a protective sleeve over them so it is tough to trace individual lines. Since they are all quick connects, I probably don't really need to trace them. If I get them backwards, it will be easy to swap.

As you can see from the picture, the new valve is smaller but the work ports are on the side rather than the end. I think I will need to buy swivel elbows for the work ports. I could mount it to the existing plate in the orientation shown in the picture with the work ports coming out on the left. The other option would be for me to weld up a new plate are orient it so the work ports are facing up or down. I don't think I want to mount it with the work ports facing down. That would make it difficult to access the quick connects. If I mount it with them facing up, I think I would still need elbows, so I'm leaning toward mounting it in the orientation shown in the picture.

On the new Summit valve, the top port in red is the P (Pump) port. I believe I could plug that and use the one on the side instead. The PB (Power Beyond) port is on the bottom. I believe it is currently plugged. The T (Tank) port is also on the bottom, but I believe it too can be moved to the side. Depending on the hose length and how I do the routing, I may need elbows on them as well.
 
Last edited:
My knee replacement will be early next week, so I'm trying to get things ready to work on this project during my recovery. Today, I took the first step. I found some documentation on the current valve on line. From that, I was able to identify the primary lines and label them. I then set the new Summit valve on top of the current valve and took a picture:

f5dc4ded-c2fe-4160-b95b-1a4ab5581b4c.jpg


You can see the labels PB (Power Beyond), P (Pump), and T (Tank) labels on the lines. The other lines are work lines. There is a protective sleeve over them so it is tough to trace individual lines. Since they are all quick connects, I probably don't really need to trace them. If I get them backwards, it will be easy to swap.

As you can see from the picture, the new valve is smaller but the work ports are on the side rather than the end. I think I will need to buy swivel elbows for the work ports. I could mount it to the existing plate in the orientation shown in the picture with the work ports coming out on the left. The other option would be for me to weld up a new plate are orient it so the work ports are facing up or down. I don't think I want to mount it with the work ports facing down. That would make it difficult to access the quick connects. If I mount it with them facing up, I think I would still need elbows, so I'm leaning toward mounting it in the orientation shown in the picture.

On the new Summit valve, the top port in red is the P (Pump) port. I believe I could plug that and use the one on the side instead. The PB (Power Beyond) port is on the bottom. I believe it is currently plugged. The T (Tank) port is also on the bottom, but I believe it too can be moved to the side. Depending on the hose length and how I do the routing, I may need elbows on them as well.
You sure that PB port is Power Beyond and not just Power B that would go to the opposite end of the cylinder that would be labeled Power A? Never heard of Power Beyond.
 
You sure that PB port is Power Beyond and not just Power B that would go to the opposite end of the cylinder that would be labeled Power A? Never heard of Power Beyond.

I'm pretty new to hydraulics, so I'm not sure about much. I've done some reading. My understanding is that Power Beyond lets the tractor's main hydraulic system transfer power to some other implement. I think the Power Beyond port on a valve passes the hydraulic fluid pass through to the next implement in the chain.

I'm guessing this B2400 4x4 had no hydraulics except the transmission (hydrostatic) and the 3-point hitch since the loader is an aftermarket SMC 64Q. I'm presuming when they added the loader, they tapped of between the pump and the 3-point hitch and went to the loader valve that is currently on the tractor. I think the hose coming from the Power Beyond port of the existing valve goes to the 3-point hitch.

One reason I'm posting here is that I'm hoping someone else has some experience with this and can keep me from screwing up. I found some installation instructions for the SMC 64Q loader valve on the internet. It shows the ports on the valve. They seem to line up with my existing valve one for one. I labeled the lines on the existing valve based on that diagram. On the valve itself, rather than a port labeled P and one labeled T like on most valves, my existing valve is labeled in and out on the existing valve itself. None of the other ports are labeled on the valve.

I'll probably need to disconnect the quick connects to trace the lines for the work ports. I'll do that eventually. I did buy some color coded cable ties that I will use to mark both ends of the quick connects just in case. The loader is not quick-connect, so I can't imagine a scenario when I'd disconnect the quick connects other than a hose replacement or something like that, but it will be helpful to have them color coded for the new loader.

If you think I got this wrong, don't hesitate to provide guidance.
Does either valve have a flow schematic? I've never dealt with tractor hydraulics but have some experience with hydraulics and pneumatics on manufacturing machines.
 
Does either valve have a flow schematic? I've never dealt with tractor hydraulics but have some experience with hydraulics and pneumatics on manufacturing machines.
Here is the link to the schematic I found on the internet that matches my existing valve: https://www.rhinoag.com/wp-content/uploads/2017/03/2-6347-VALVE__PLUMBING_KIT-03-31-10.pdf
Note: If you look closely, you will see that my valve is mounted upside down compared to the one in the schematic.

It is not a full schematic, but here is a link to the new valve I bought: https://summit-hydraulics.com/produ...onal-control-valve-w-joystick-2-spool-11-gpm/

If you scroll down, it has a diagram showing it used on a loader. This little tractor does not have rear remotes, so I presume the power beyond port is going to the 3-pt hitch. Presuming I'm reading the schematic and diagram correctly and properly marked the power beyond line properly, it will go wherever the current power beyond line goes.
 
Last edited:
Here is the link to the schematic I found on the internet that matches my existing valve: chrome-extension://efaidnbmnnnibpcajpcglclefindmkaj/https://www.rhinoag.com/wp-content/uploads/2017/03/2-6347-VALVE__PLUMBING_KIT-03-31-10.pdf Note: If you look closely, you will see that my valve is mounted upside down compared to the one in the schematic.

It is not a full schematic, but here is a link to the new valve I bought: https://summit-hydraulics.com/produ...onal-control-valve-w-joystick-2-spool-11-gpm/

If you scroll down, it has a diagram showing it used on a loader. This little tractor does not have rear remotes, so I presume the power beyond port is going to the 3-pt hitch. Presuming I'm reading the schematic and diagram correctly and properly marked the power beyond line properly, it will go wherever the current power beyond line goes.
The first link doesn't work. But looking at the second link it looks like the power beyond is a pass through to another valve bank. I'll assume it's an open center valve and instead of going to tank it goes to the second valve bank and goes to tank from there when the first valve isn't being used. The oil must go to tank from the first valve when it's being used.

If you look at the first diagram it shows the A1-B1, A2-B2 that would go the the cylinders that are doing the work. Those are the ones I was referring to in my first post.

Does your tractor have a second valve bank for the 3-pt?
Jerry,

Thanks! First, I figured out why the first link did not work for you and I updated that post. You should now be able to use that link. If not, let me know.

My B2400 is an open center hydraulic. I presume there has to be some kind of valve for the 3-pt because you can raise and lower it with the lever. I presume that lever is controlling a hydraulic valve. I presume what is where the Power Beyond point is going.

Yes, the A1-B1 and A2-B2 ports are where the quick connects go with one bank to the loader and the other to the bucket. There is no third function with these valves for a grapple or anything else up front.

Look a the new valve in the picture where it sits on top of the old valve in the orientation I'm currently planning to install it. Then scroll up to the post that has the pictures of the new valve by itself. That post has 2 pictures. The top picture has the valve in the same orientation as I plan to mount it. In this picture, you can see the side of the valve that you can't really see in the picture with it sitting on the old valve. I believe the 4 ports with the red caps on that side are the A1-B1, A2-B2 work ports you are referring to.

I believe the port on the top of the unit in that picture is the P port coming from the pump. If you look at the lower picture in that post with the valve on its side (relative to how I plan to install it), you can see there are 2 ports on the bottom, one has a red cap and the other has a silver plug. I believe the port on the bottom with the red cap is the T port going to the tank. I think the port with the silver plug is the Power Beyond port going to the 3pt hitch valve.

Now that the first link works, you should be able to figure out why I labeled the lines going to the existing valve as PB, P, and T based on the diagram of the old valve installation.

Let me know if you think I got this correct.
 
Do you use the 3-pt?
Figure 2 for the original valve shows A1-B1, A2-B2 then a pressure port and a tank port. Look at fig. 3 and it shows the hoses from the 3-pt valve going back to the first valve. It appears it goes through the first valve and then to tank, through the tank port and hose #12. Can you do this with the new valve?

The new valve has some letters cast into the body. T will be tank-has red plug, P will be power in or pump-has red plug, N should be the power beyond-has metal plug and the other 4 red plugs are for the loader. But you'll still have to accommodate for the 3-pt to tank and for pressure.

Looking at the literature from Kubota could you have gotten valving or repair parts from them?

First, that is not Kubota literature. It is the installation guide for the aftermarket SMC 64Q loader and valve. The valve they have does not have float which is why I'm changing out the valve. I want a valve that has a float position.

When I look at Fig 2, I see 7 ports, Power Beyond, pressure (or pump), Tank, and the 4 work ports. When I zoom in on figure 3, I see the Power Beyond port on the bottom of the valve. On the back of the valve, I see the 4 work ports with the quick-connects on the left hand side of the valve. On the right hand side of the valve, I see two ports, on above the pieces that stick out and one below it. The pressure or pump port appear to be the one above, and the tank port appears to be the one below.

When you look a the pictures of the original valve on my tractor, it appear to be inverted (upside down) compared to the one in figure 3. One more difference that I see between my tractor and figure 3 is that the mounting plate is mounted on the opposite side bracket than shown in the figure.
 
Oh yes, I forgot to answer you question about the 3pt. I do use it. I have a belly mower on the tractor and the 3pt is used to raise and lower that deck. In addition, occasionally I will use a finish mower, box blade, or tiller on the 3pt hitch.
 
First, that is not Kubota literature. It is the installation guide for the aftermarket SMC 64Q loader and valve. The valve they have does not have float which is why I'm changing out the valve. I want a valve that has a float position.

When I look at Fig 2, I see 7 ports, Power Beyond, pressure (or pump), Tank, and the 4 work ports. When I zoom in on figure 3, I see the Power Beyond port on the bottom of the valve. On the back of the valve, I see the 4 work ports with the quick-connects on the left hand side of the valve. On the right hand side of the valve, I see two ports, on above the pieces that stick out and one below it. The pressure or pump port appear to be the one above, and the tank port appears to be the one below.

When you look a the pictures of the original valve on my tractor, it appear to be inverted (upside down) compared to the one in figure 3. One more difference that I see between my tractor and figure 3 is that the mounting plate is mounted on the opposite side bracket than shown in the figure.
Oops! I assumed the literature was from Kubota. It appears you are correct, if you have the hoses labeled correctly, the valve is inverted. Do you think your hoses will be long enough to make the connections? I think you'll be good to go as long as your hoses are long enough. Do you know what the o-ring material is with the fittings you'll use? We had much better service from viton vs buna.

The mounting plate is opposite the hoses to the loader, but that would be because the valve is inverted?
 
I think my hoses will be long enough, but I think I'll need swivel elbows for the work ports at least. I order some last night. I'll probably move the plate to the other side of the bracket. That will give me a bit more room on the side of the valve for the elbows and quick connects. It moves the valve about 2" over. The new valve is thinner, so that will give me some more room as well.

I don't know what kind of o-rings are used. I'm hoping to reuse all the fittings from the original valve and add the elbows.

I bought this tractor at auction for less than $5k about 20 years ago. It had rental stickers on it so I presume it was a rental unit. I've more than gotten my money out of it. It has been very low maintenance compared to my Kioti DK45 which always seems to be in the shop. If I had to guess, the tractor originally had no loader. I'd guess someone purchased the SMC 64Q aftermarket and added it. It doesn't really matter from a functional perspective which orientation the valve is mounted. I presume whomever added the loader simply did not follow the directions when installing it. I don't think any of the occasional sticking has anything to do with the mounting as it has worked fine for many years. The existing valve is probably just old and needs the springs replaced. I may have been able to do that, but I think it will be easier to replace the entire valve and that lets me use one with a float position.

Thanks for the help and sanity check.
If you need new o-rings I'd go with the viton. As for the elbows I'd use ORB fittings, you can position them at any angle you need then tighten up the nut to seal the o-ring and lock it down.

Good luck with the knee and tractor project.
 
Back
Top