New One Man Boat

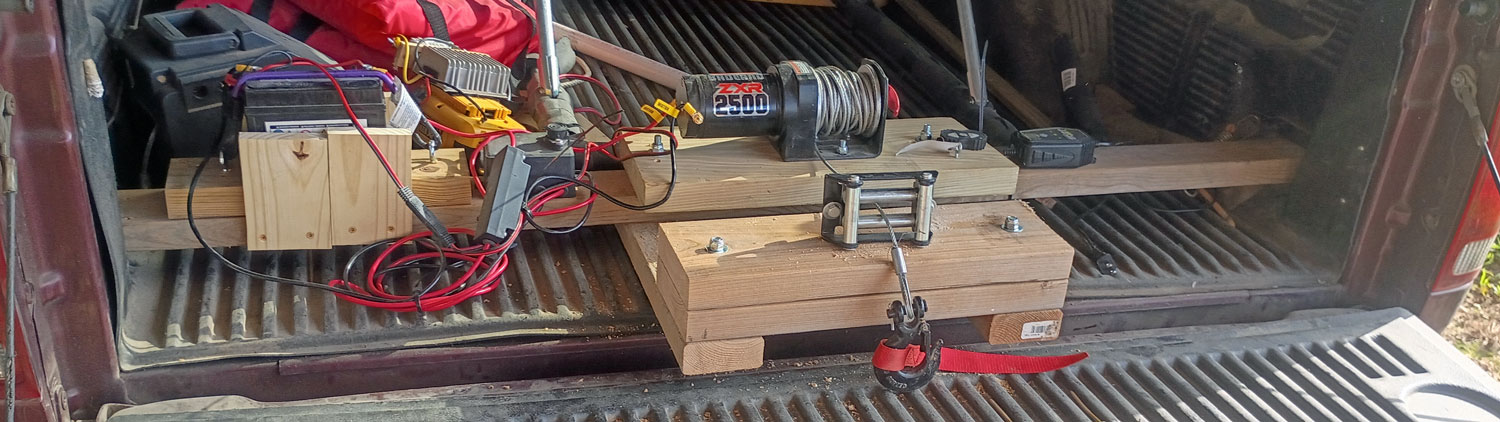
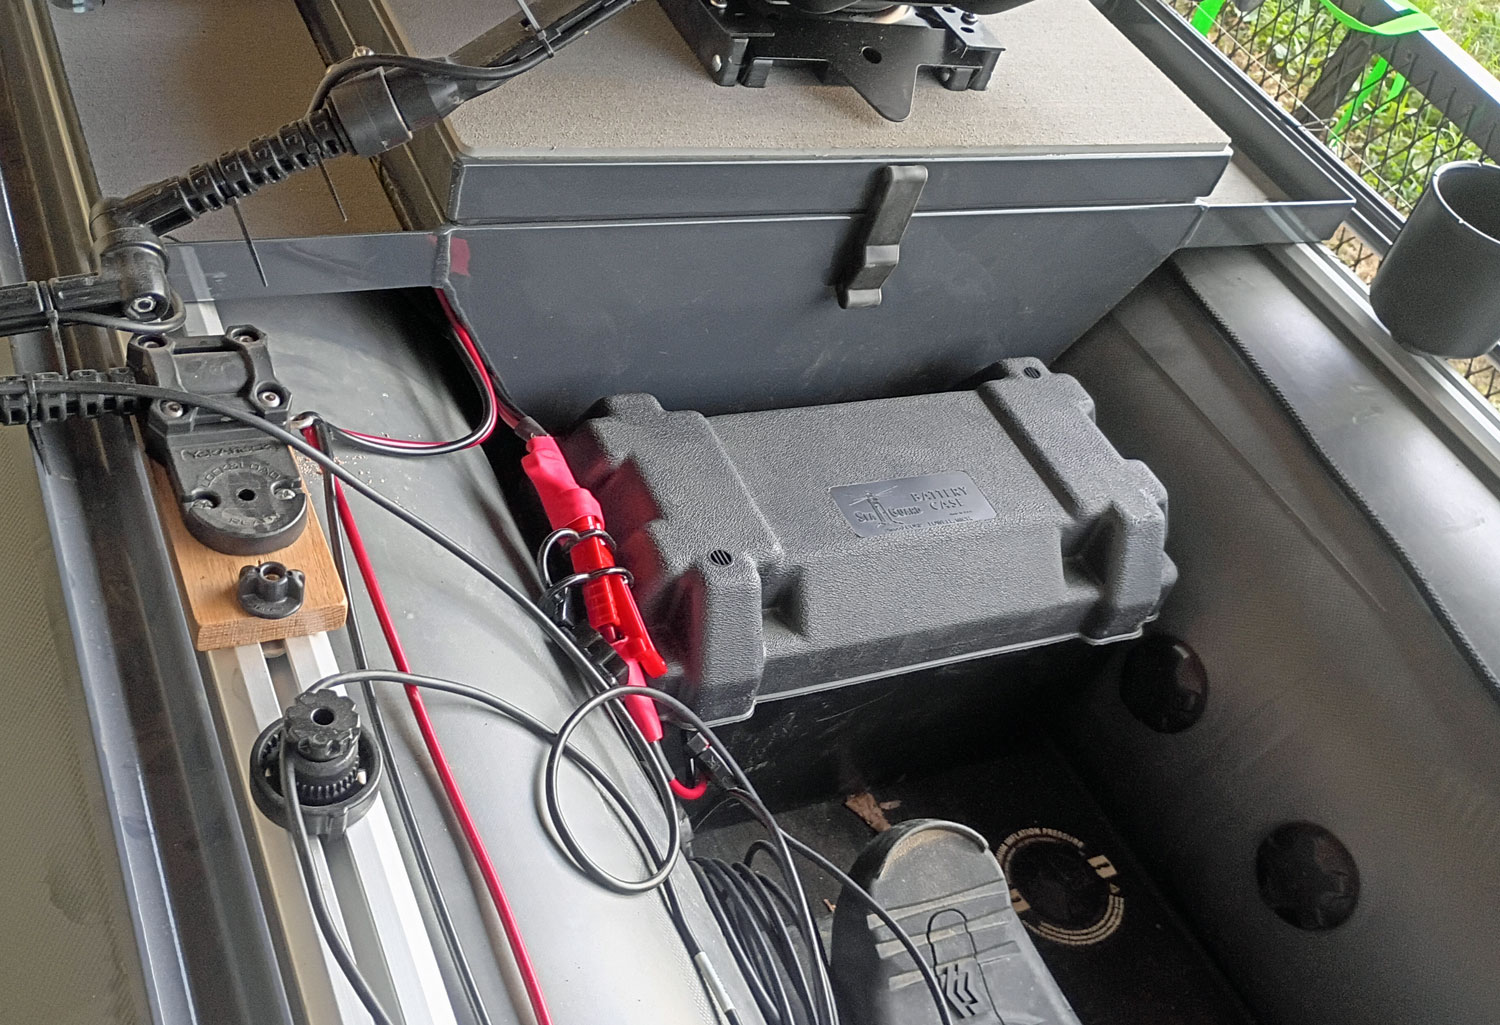
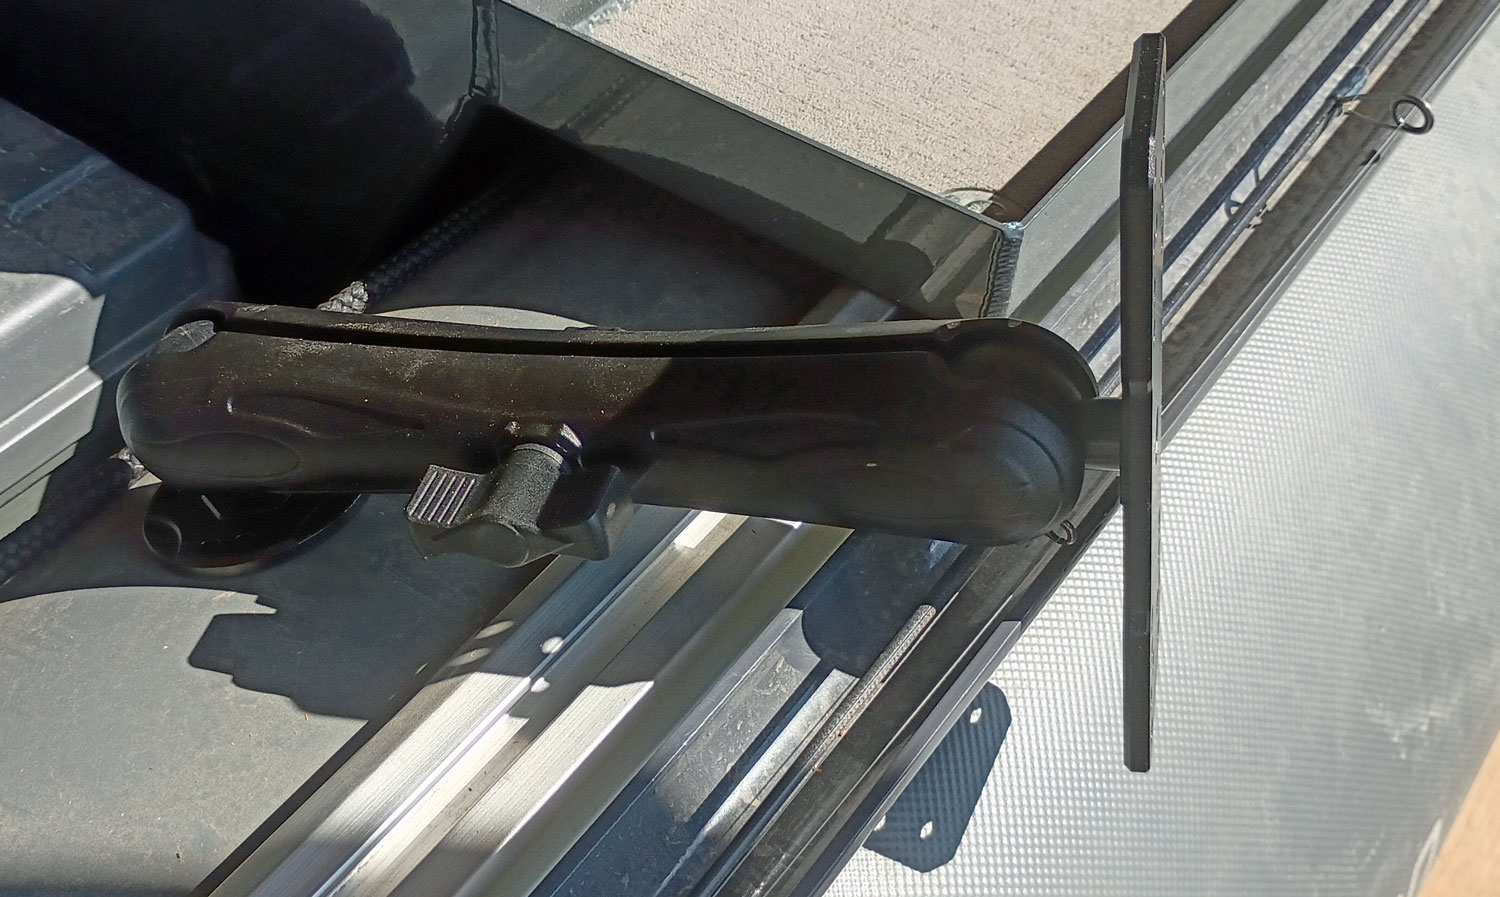
Yesterday wore me out, so I'm moving pretty slowly today. Here is the picture of the truck bed winch board I was referring to:

067a97fa-223b-4052-b705-7661ffb4c91b.jpg


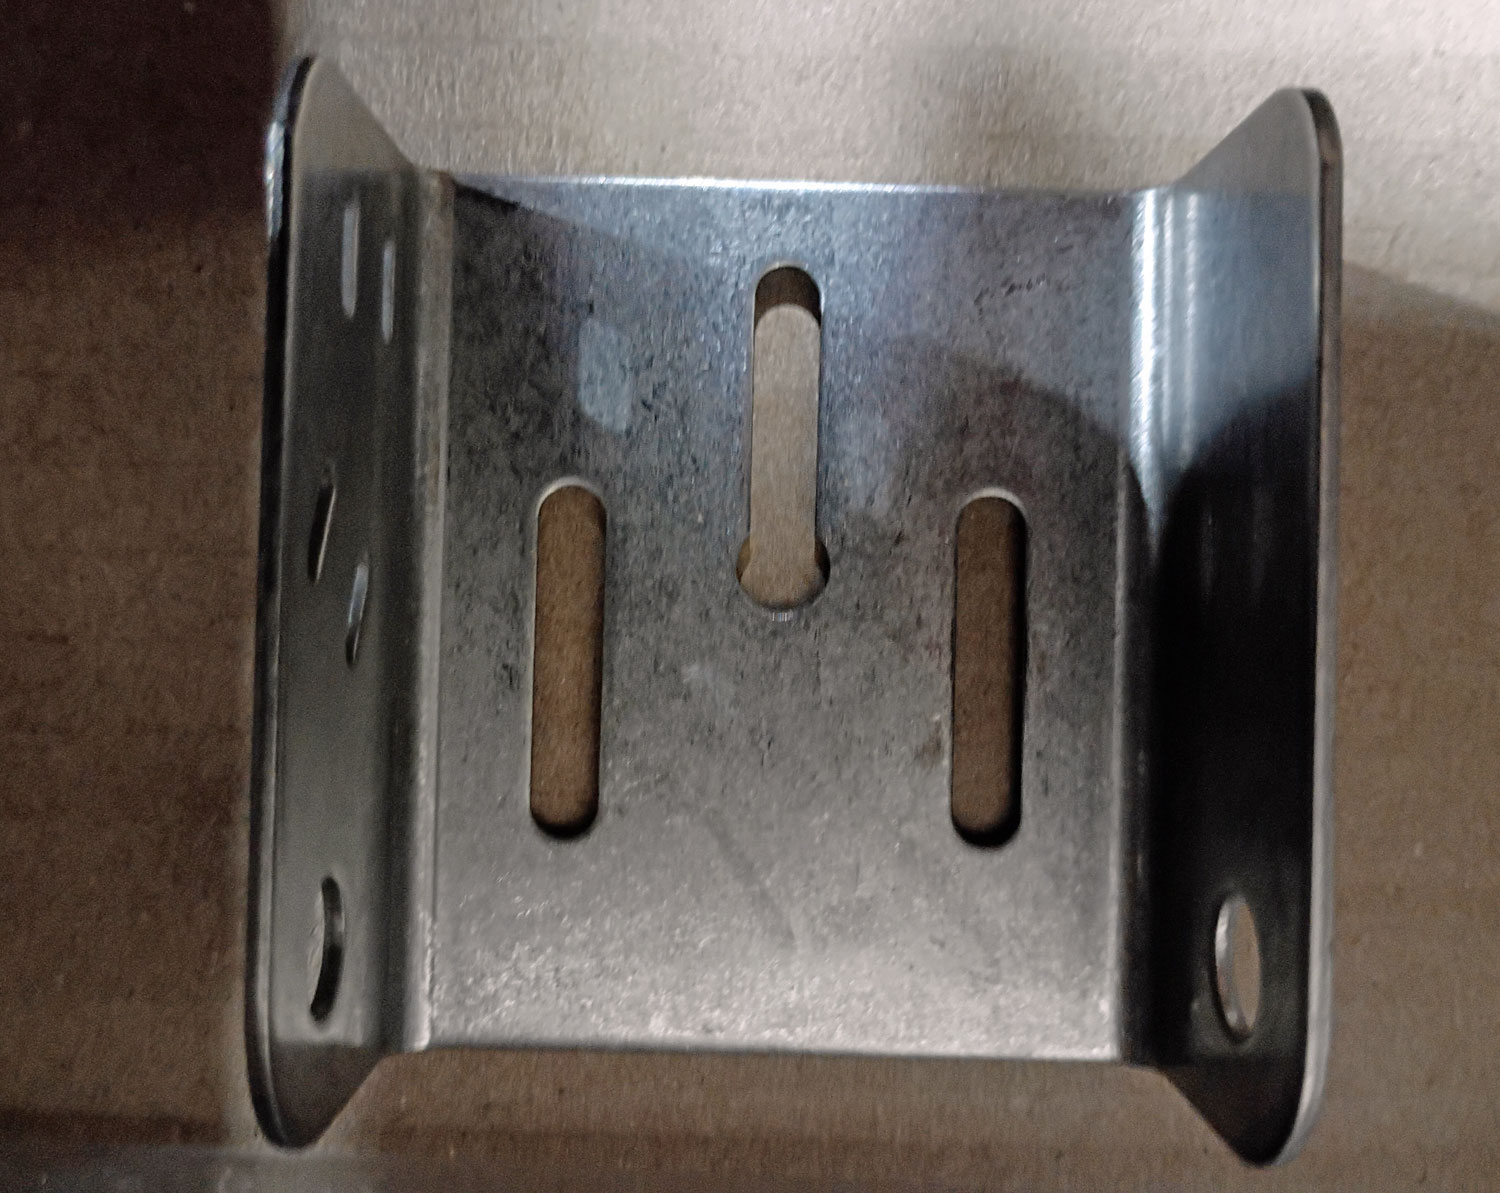
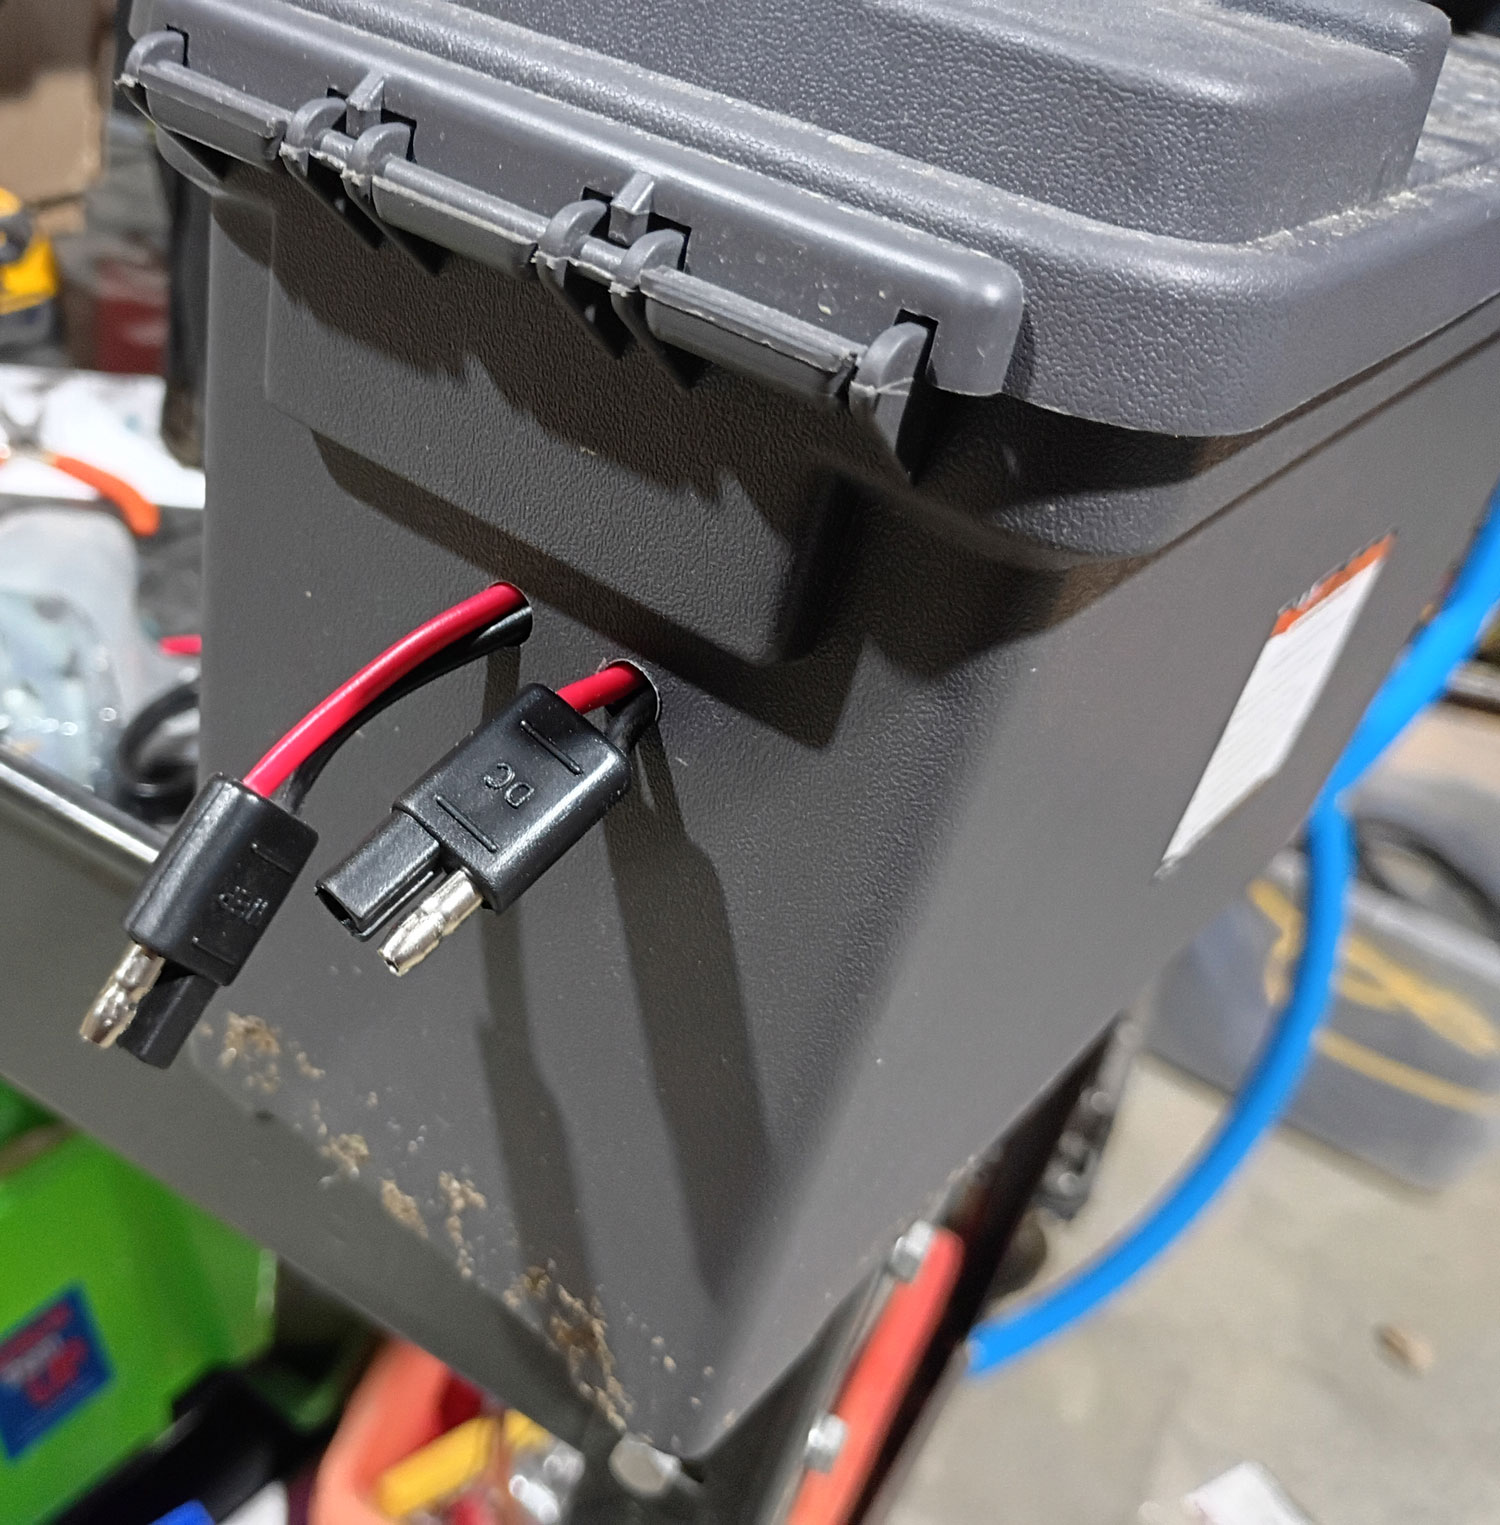
It is basically a 2x4 sized to wedge into the bed of the truck supported at the ends. On the left you see the ATV AGM Battery that I boxed in so I can move the board easily. Next to it is the circuit breaker and wired control box that comes with the winch. I don't really use the wired controller, but I keep it in the truck just in case the remote fails. The winch was previously screwed into a piece of 2x8 with deck screws. There used to be a single 2x6 directly under the winch sticking out on to the tailgate a bit. The winch was mounted on it with those silver brackets I dug up. You can see that when we mounted it on the tree with the cable from the winch going down through the fairlead and then taking a sharp turn to the boat, that the fairlead was not setup for that and the brackets holding it bent. The remote control is clipped to an eyelet and a 3 amp charger is secured to the board.

It worked great when used as designed in the truck bed, but failed when we tried to tie it to a tree as a make-shift winch to winch the boats up and down a steep bank. After the fairlead brackets broke, the single 2x6 under the winch had the decking screws pull out. Again, it was not designed to be used in that orientation.

You can see in the picture how I intend to modify it. I'm still not going to change the design to let it do double duty and winch boats up and down the steep bank. We can set up a different winch for that. I do plan to beef it up and use carriage bolts in place of the decking screws. Instead of a single 2x6 coming out on the tail gate, I plan to use two 2x4s and run a couple 2x6s between them. I still have not figured out how to attach the fairlead.
 
I finished beefing up the winch board except for attaching the fairlead. It is just sitting there:

0e38262d-25db-45fb-b1be-57c6eb055b71.jpg


Next, I started working on reconfiguring the boat. I decided to move the battery from the front to give me more room for the foot control and get it closer to the motor. I put the small battery for the fish finder up front and used the same strap to lock it in as I was using for the big battery box. I measured the battery box and it will only fit horizontally if I remove the handles. Since the battery itself has a handle, that should pose not real issue.

I decided I want to be able to put the battery in two different locations easily. If I am taking one of the neighbor boys, I'll need to put it in front of my seat as shown here:

b3498ac4-ceb5-4db7-8007-86baf6944884.jpg


Note, for testing, I'm just using the battery box and the battery is sitting on the side of the boat.

If I'm alone, I can put it behind the seat like this:

52418e4a-c062-4e8f-a883-631239fb772a.jpg


My plan is to put an Anderson connector on the wires coming from the battery and make them long enough to feed under the seat to the rear position. That should make it easy to move the battery and box between locations.
 
I got all the rewiring done to day. I then headed over to the farm and welded up a couple brackets for the fairlead:

d305fbe9-3bc0-4e38-964b-2dd5ffad27b6.jpg


I also pulled the end of the boat slightly off the trailer so I could test the motor. Without the big battery jamming the foot control into the side of the raft, the foot control operated much for freely. I decided not to change the tension on it.

I invited the neighbor boy to go fishing tomorrow, so I rigged the boat with the battery in front of my seat:

5280fc55-d835-4997-bbf2-da98bc982fd6.jpg


You can see the Anderson connectors connecting the battery. To move it to the rear of my seat, I just disconnect them, move the battery and box, and then slide the connectors under the seat and reconnect them.

Once everything was rewired, I brought out the charging board to make sure everything charged back up properly. I had not had a chance to play with the settings on the Helix 5 DI GPS, so I brought the battery and head inside this evening and put it in simulation mode. I watched a couple youtube videos on it and adjusted the settings accordingly and then reinstalled it in the boat.
 
Jack, I saw something on a Youtube video today that made me think of you. A couple were loading a boat similar to yours and they placed a piece of 3-4" PVC under the boat when they got it started on their trailer. As they pushed the boat up, it rolled over the PVC all the way forward. Then the fella tipped the boat and removed the PVC for transport. Looks like a solution to your friction problems.
 
Jack, I saw something on a Youtube video today that made me think of you. A couple were loading a boat similar to yours and they placed a piece of 3-4" PVC under the boat when they got it started on their trailer. As they pushed the boat up, it rolled over the PVC all the way forward. Then the fella tipped the boat and removed the PVC for transport. Looks like a solution to your friction problems.
Yep, I tried 2 pieces of PVC under it. It rolled very easily. I lost one during transport. I've been using 1 ever since. It rolls fine with no issues and the PVC is not in threat of coming off the trailer. The boat does rock a bit over the PVC when I go over bumps, but not enough to be a problem.

I'm doing this while I'm borrowing my neighbor's trailer. Once I pick up my new trailer, I plan to add some rollers to the rear of it after removing the gate. I can still use the PVC if I think it is necessary.
 
Well, I got a bit of a head scratcher today. I took a neighbor boy fishing. We only caught a few fish, but we had fun. I did notice that same problematic chamber was a little low, so I filled it when we got back and sprayed the chamber seams again with soapy water looking for leaks. I found one suspect area but can't convince myself there is a leak there.

So, here is the head scratcher. When I plugged in the charging board, I noticed the motor battery was not charging. I removed the adapter from the female connector I installed on the boat and installed the clamps on the charger and connected it directly to the battery. It charged fine.

Since the motor worked fine at the lake, I presumed there was an issue with the adapter pigtail for the motor plug. I buzzed the cable and it buzzed out fine. So, why would the motor run fine when plugged into that same port but the charger not charge the battery when plugged into the same port? If the motor runs from the battery, it would seem to indicate the wiring from the plug to the battery was fine. The only other wire is the pigtail between the charger and battery. I can't think of any reason the battery would not charge through that port.

On a positive note, my new Xplore SI is supposed to arrive tomorrow. I plan to replace the Helix and give it to the neighbor. Eventually, I want to get the Megalive 2 transducer and it is not compatible with the helix. The version of the Helix that I have has down imaging but not side imaging, so that will be new to play with.

It may be a while before I get the forward looking Megalive 2 transducer. For now, I'm contemplating ideas for a pole to attach that sensor to. I don't like the idea of putting it on the trolling motor. I think I'd like a separate pole for it.
 
If you want live go with Garmin, there is no substitute. If you are river fishing, electronics will have little value in shallower water.
 
If you want live go with Garmin, there is no substitute. If you are river fishing, electronics will have little value in shallower water.
Thanks. I did look hard at Garmin. You are right about shallow water. I don't expect much from them in shallow water. I'm hoping the benefit will come in with larger rivers and lakes. The like I took the neighbor boy fishing at today was about 25' at the deepest point. I'm still trying to get the hang of the new electronics. Tech has changed significantly since I was fishing 20+ years ago. 2D was high tech back then compared to my original depth finder.

I thought the Helix with gps and DI was hot stuff until I started looking into SI and FF. The lake we were fishing is largely featureless. Most of the structure is shoreline. I'm still catching on to DI. My new Xplore is due in tomorrow. I hope to play with that in simulation mode. I hope to be trying different bodies of water with more structure. I just wanted a place that is close and where I'm confident launching the boat for now. Once the neighbor boys are back in school next week, I'll venture out to new locations.

I've heard very good things about Garmin's Live View. I've seen it head to head with Megalive2 from humminbird. It is probably my lack of ability to read it, but I could not see a significant difference between them. If I was only looking for FF, I think Garmin might have a slight edge. Without a big gap between them, I decided to go with Humminbird largely because of the learning curve. Since I've been using the Helix and watching videos on the Xplore usage, it seems like the learning curve is less than changing brands.

One note on river fishing. I grew up fishing moving water. That is where I'm a home. I don't seem to need any help in finding and catching fish in a river or stream. I think there are so many more observables that let me know just where to case and how to move the lure through the water. Once I get on a lake, I've been pretty much stuck to the shoreline.
 
The new Xplore 9 came in this morning! I wasn't expecting it until tonight. I began trying to figure out how to install it on my boat. Because the transduce is much larger than the Helix and is intended to be mounted to the hull with a heavy duty bracket, I'm not sure if the YackAttack switchblade can handle it. I decided to give it a try since my boat will only operate at low speeds with a trolling motor. After looking at the Switchblade for a bit, I decided to rotate the blade part 90 degrees and use the same mounting hole as I used for the Helix. I first found the screw provided with the Switchblade was slightly too big for the heavy duty Xplore transducer bracket, so I headed to the drill press:

a816e6d5-55a4-4596-bc83-1e08999a2329.jpg


Notice the end of the center slot is now drilled out slightly so the screw fits. I then removed the Helix transducer from the Switchblade. I rotated the blade part and installed the bracket for the Xplore transducer. I had plenty of 4" cable ties left over from a loader valve replacement I did on my tractor a while back. I used different colors to label the hoses. I grabbed a bag of them and began to secure the new transducer cable. It is significantly larger in diameter than the Helix cable, but the 4" ties seemed to work well. We will see if the Switchblade can hole the larger transducer in place the next time I hit the water.

56bb863e-eba0-4493-a399-6d8ec2f76a38.jpg


My next challenge is installing the head. It is much larger and heavier. I weighed it at about 4 1/4 lbs. The YakAttack mount I was using for the helix head was too small to fit the holes in the helix bracket. I'm even more concerned that so much weight suspended that high will be a problem. I decided to mock it up. I attached the Xplore bracket to the YakAttack bracket with cable ties and installed the head. The bracket itself is plenty solid, but the attachment to the rail is dicey.


As you can see, there seems to be a lot of movement and stress at the rail attachment point.
 
Next, I began to work on power. I first added a second connector to the Fish Finder battery box. I know the battery I was using for the Helix will not be sufficient for the Xplore once I get Megalive2 added. They are recommending 50-60 ah for that configuration. I figure that I'll deal with that when the time comes. I plan to use the same 12 ah battery I was using for Helix to start with Xplore.

537c2aef-22b8-4f47-ace5-032170353e41.jpg


I then added the same connector to the end of the power cable that came with the Xplore. The first thing I noticed was that there was a ground wire in addition to hot and cold. I'm guessing that is being used for shielding. I read a few posts that said customer support was telling folks to ignore it. Just to be on the safe side, in case I have some interference issues in the future, I ran a short span of ground wire out the end of the shrink wrap past the connector. If there is an issue, I can connect it to one of the screws that are holding the trolling motor bracket in place.

16fd3f25-f39b-4b74-b251-86420f88aca9.jpg


If all went well, I should be able to power up the Xplore and put it in simulation mode and play with it.

Next, I decided address the issue with the YakAttack Lock and Load mount and the Xplore head. It was as simple as removing one section of the mount and reassembling it. This reduces the degrees of freedom I have in adjusting the position that I wasn't really using anyway. This seems much more stable to me now. I'm now convinced enough that this will work to drill holes in the bracket.

 
Hopefully the hull doesn't interfere with the SI on that side. I can't tell how low the transducer is riding.
Good point. I think it will be deep enough given most mounts are on one side or the other of a boat stern. But, I won't know until I try. I hope to be building a pole mount for FF down the road. I guess I could always do something like that if the switchblade does not work out. The transducer is high in the picture . There are two hinges on that switchback that will let me drop it a few inches into the water. It was enough for the Helix transducer, but who knows with the Xplore.

I did my first intro to the head unit today. There was one step missing in the Quick Setup that sent me down a rabbit hole. The guide did not tell me to select "Normal" mode. I did not make a selection quickly enough as I was trying to find that missing step in the quick setup. Evidently, if the transducer is not plugged in and you don't respond it time it defaults to Demo/Simulation mode. When I went into settings, Demo mode was greyed out so I could not turn it off.

After a chat with tech support, the missing step was selecting "Normal" mode when the unit turns on. You can then go in and turn on simulation mode and turn off demo mode. None of the setting changes are saved when the unit is in Demo mode.

Once I got past that hiccup, things went very smoothly. I found it very user friendly and easy to use. I did notice the software is out of date and I need to buy a microSD card to update the code.

When I was done with that, I decided to go ahead and drill holes in the head bracket to fit the YakAttack mount. That worked out well and it seems quite secure. The only other thing I think I need is a fuse. The Helix needed a 3 amp fuse and they suggest a 5 amp for the Xplore with Megalive2. It did fine with the 3 amp with no transducer plugged in while I was familiarizing myself with it.
 
I picked up a 5 amp fuse this morning along with some PVC for a FF pole that I hope to build down the road. I resolved the electrical issue. The motor worked fine but when I got home I could not charge the battery through that receptacle. When I tried to move the battery behind the seat this morning I found the issue. One of my crimps on the battery was bad. It must have failed on the transport home which is why the motor worked. I got that recrimped today. I tested it and the motor worked fine. I can't really test charging until I deplete the battery.

I had considered heading out to test the new Xplore today, but decided to wait till next week. I ran out of energy after doing some other tasks this morning and I probably won't go over the weekend so I have less others to deal with.
 
I decided to work on a pole for the future Megalive2 transducer today. While mine won't be exactly the same, I stole a large part of the design from this video:


I purchased the same fish finder head mount used in the video:

4bc91d6b-1c2b-4fe2-8df1-5c1b8bc548c3.jpg


I will attach the base to the rail, but it needs to be raised in order clear the rod holder and extend 90 degrees over the side of the boat.

95c9b2d4-c596-4349-988f-0cf5606dbf30.jpg


I will use a piece of teak left over from the trolling motor deck to raise the unit. You can see the basic block to the right of the picture. After I finish staining it with the Danish teak oil, I'll attach the base ball with screws and then drill holes for the attachment to the rail with thumb screws and T-nuts.

I plan to attach the 1 1/4 inch conduit to the bracket for the fish finder head as shown in the video. I did the best I could to take measurements with the boat trailered. My inner pole will only stick out far enough to attach the MegaLive2 transducer. I do plan to stiffen the lower part of the the inner tube by sanding down and inserting a piece of 1" PVC, but I see no reason to let it stick out below the inner EMT pipe.

The "remote control" the guy made in the video may be fine for his situation, but it doesn't seem the juice is worth the squeeze for me. The top part of the inner EMT is about 16". I plan to put a PVC Tee fitting on it. That seems to be about the correct height for me. Out of the Tee will be 2 pieces fo PVC, one will be my handle for controlling it. The other will be the pointer for the direction the FF transducer is pointing.

I noticed the price on the MegaLive2 transducer dropped by about $100 on Amazon recently. I'd love to see it drops some more before I buy it but I doubt it will. My plan is to complete the pole and test the pole as well as the Xplore early next week. If that all goes well, I may pony up for FF sonar.
 
Why wouldn't you just mount on your trolling motor? The only reason I wouldn't is if you use spot lock.
That was my first thought, but this boat has a pretty big wind profile. If I eventually get a Terrova, I may use spot lock, but even with my current Edge, I may be trying to hold position pointing in a direction other than I'm looking to fish. I like the idea of having them independent. Another example may be that I'm traveling parallel to a shoreline looking under docks and such. I may want the FF pointing off to the shoreline side.
 
I'd rather use my arms to fish. There is probably no perfect solution but 99% of the time I'm glad my livescope is on my TM.
Yep, probably different situations. They do make mounts for the expensive trolling motors that rotate independently. One of the considerations for this pole is to make sure there is enough resistance that I only need to point it and it stays while I fish.
 
One of the small changes I made to the approach shown in the original video for the Megalive2 pole is shown here:

d54c779c-70a7-44fd-9304-865b21411f3f.jpg


I simply decided where I wanted to place the plate of the head mount on the outer EMT, about 1" down from the top. I took the EMT to the belt sander and flattened that area. I think this will provide more surface area contact for a better grip with the marine adhesive.
 
Back
Top