Step by step deer butchering (w/ pics)

Ron Kulas

Active Member
Step 1. Build an addition onto your house that is a 2nd kitchen and dedicated game processing and sausage making area with a hoist in the ceiling and an epoxy coated floor for easy cleanup..

Step 2. Harvest a nice fat deer with your bow.

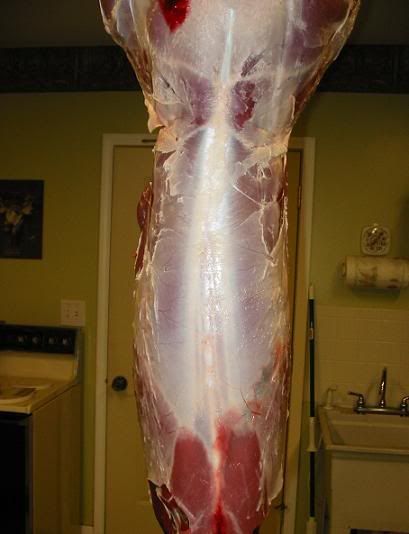
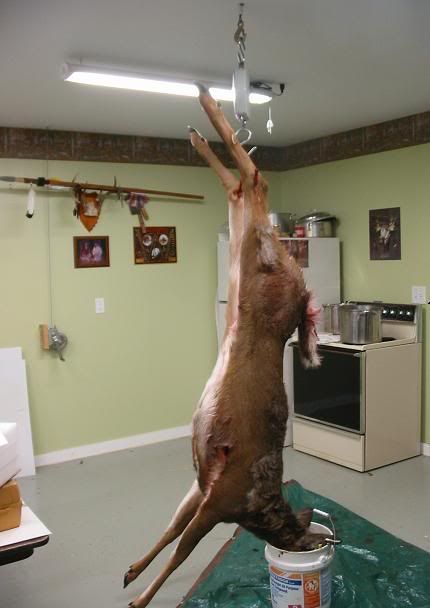
Step 3. Gut it out and hang it. I like to hang them from the hind legs because I find they skin easier for me. How long you hang it depends on how warm it is where you live.

hanging_doe.jpg


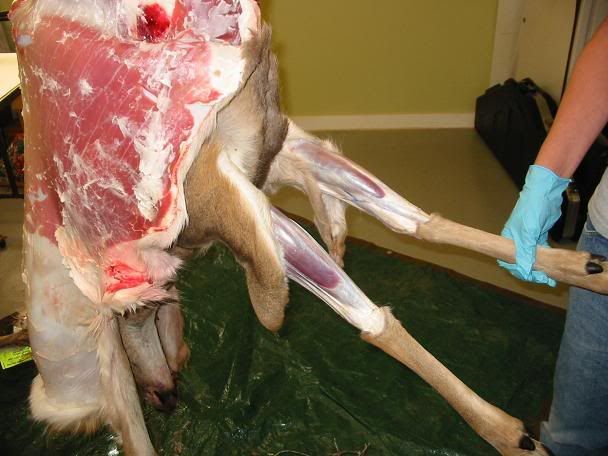
Step 4. Tell your Son you want to do a pictorial on deer processing and that he "Gets" to process a deer so you can take the pictures. Tell him to cut the hide around the hind legs and start to peel downward.

josh_skin.jpg


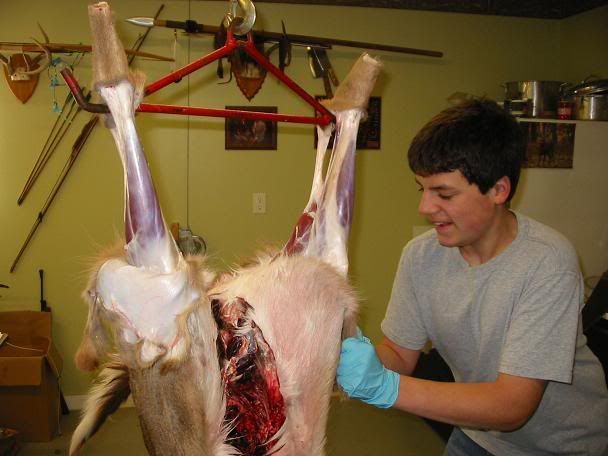
Step 5. Tell him to do more pulling than using the knife so that he doesn't cut the hide because later, you want to teach him how to stretch that hide on a frame and make rawhide

josh_skin2.jpg


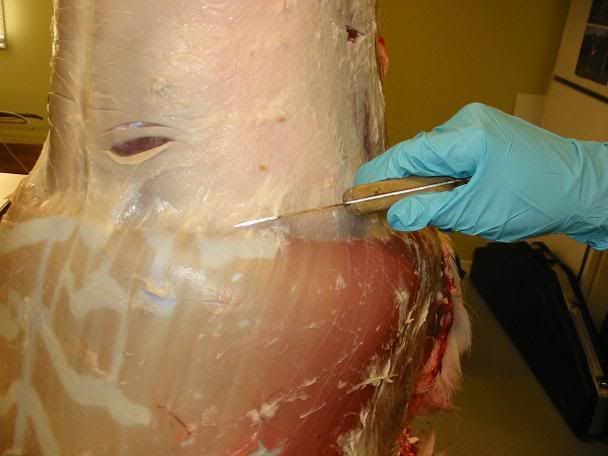
Step 6. Tell him that if he must use the knife, to pull on the hide and only cut the stretchy membrane that joins the hide to the meat.

josh_skin4.jpg


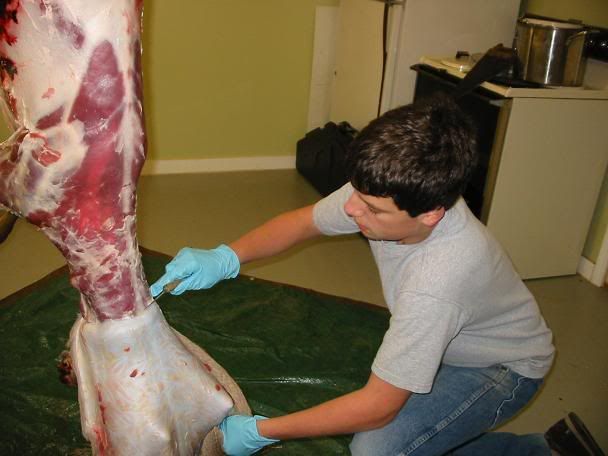
Step 7. Before he gets to far along and covers the front legs with the hide he has peeled off the deer, tell him to cut the hide around the front leg joints and to split the hide upwards, towards the brisket.

josh_skin5.jpg


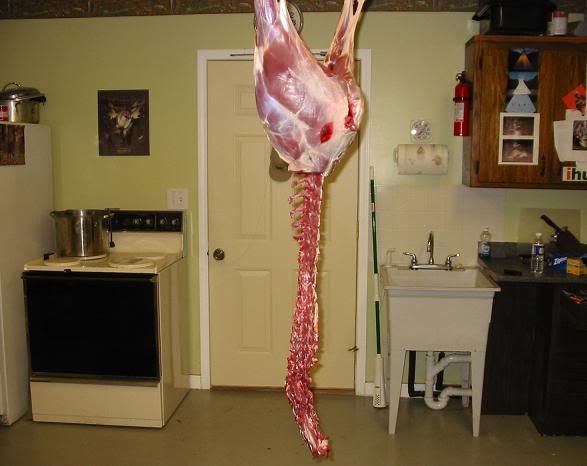
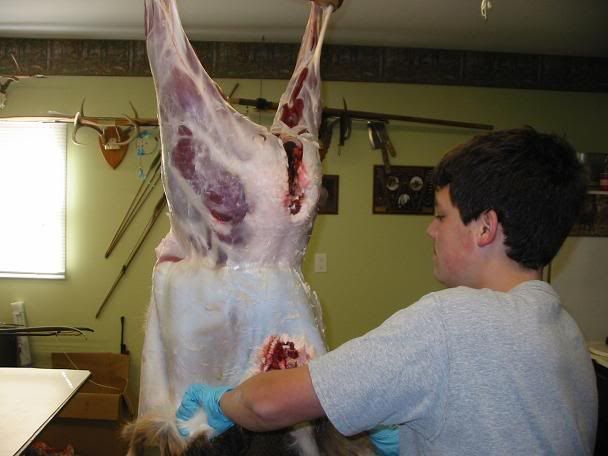
step 8. Once finished with the front legs, tell him to continue pulling down on the hide while he skins out the neck. When he starts to whine about how hard it is to skin the neck, tell him that the next deer will be easier.

josh_skin6.jpg


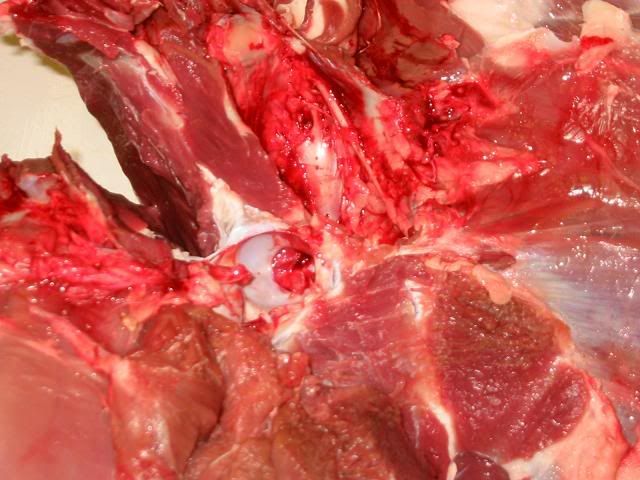
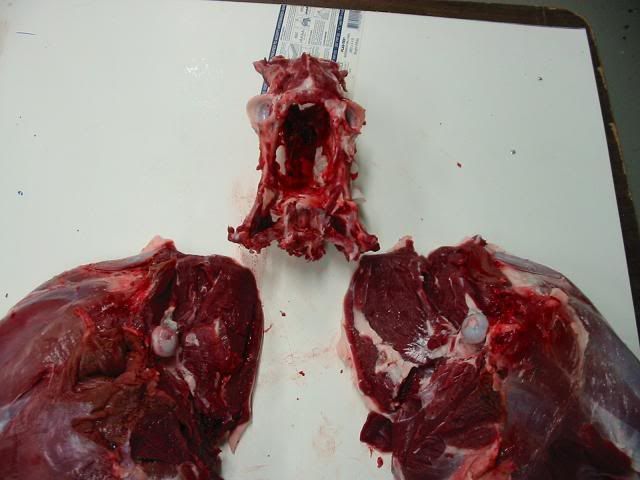
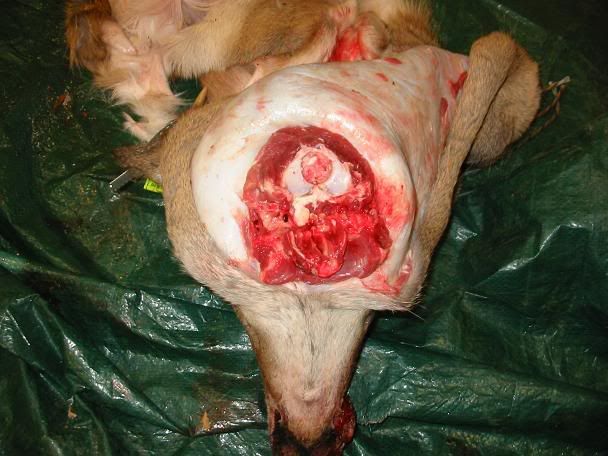
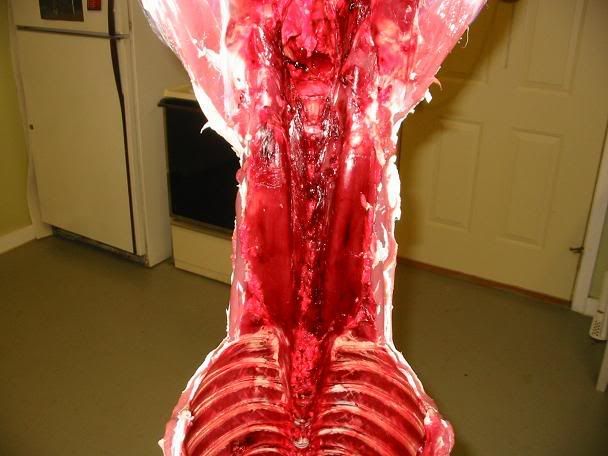
Step 9. Tell him to skin the deer up to the back of the head so as not to waste any of the good neck meat. When he has gone far enough, tell him to cut the neck all the way around until he hits bone.

josh_skin9.jpg


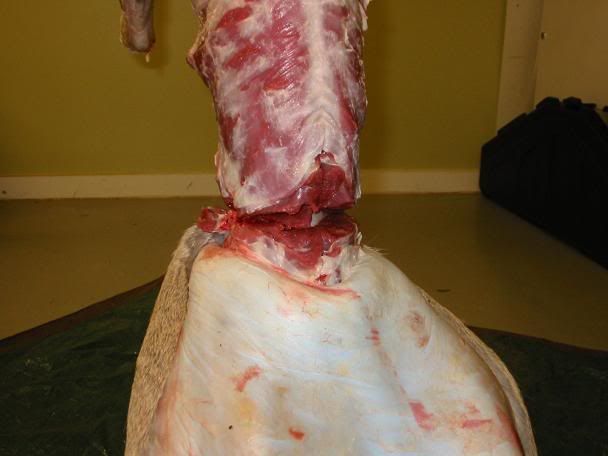
Step 10. When he asks where the saw is, tell him that he can simply cut between the neck bones to separate the head from the carcass. Remind him that he is getting all sorts of lessons in deer anatomy that will make him a better hunter

josh_skin91.jpg


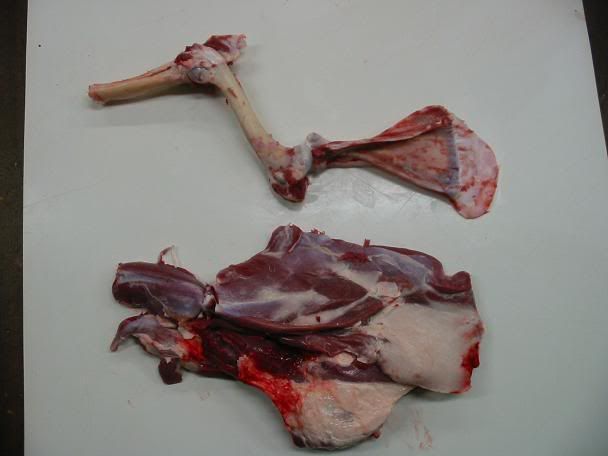
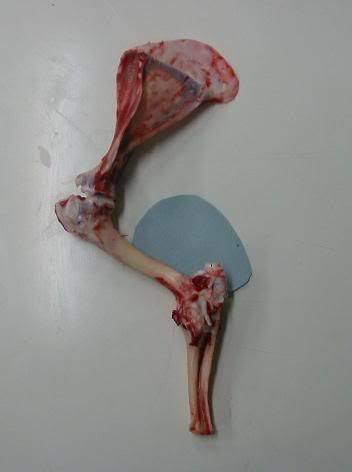
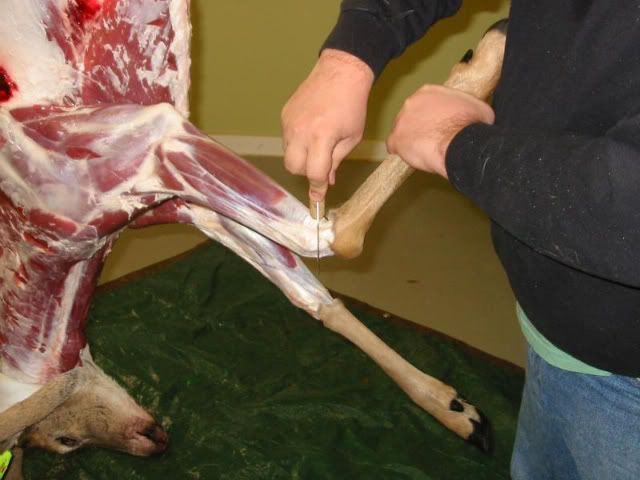
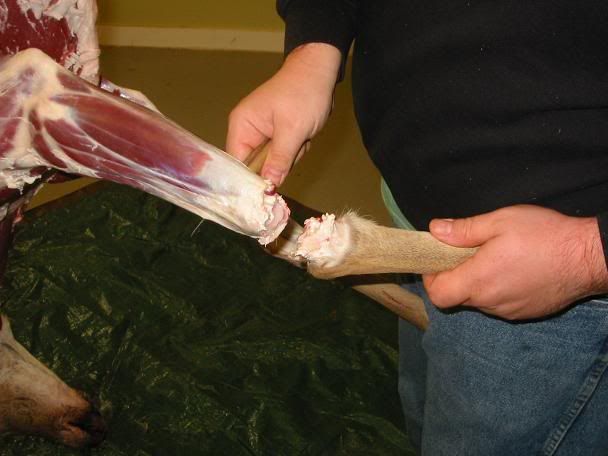
Step 11. Give him a break and let him take a few pictures while you show him how you don't need a saw to remove the front legs because you can simply use a knife and cut through the knee joint.

josh_skin7.jpg


josh_skin8.jpg


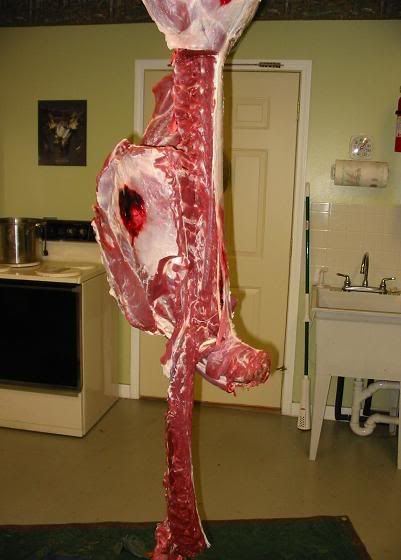
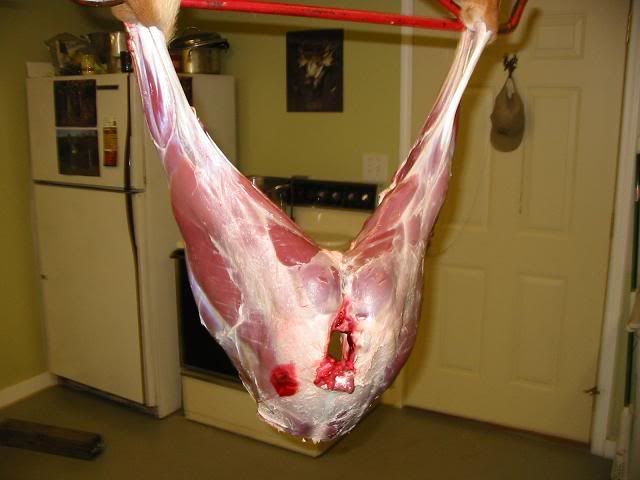
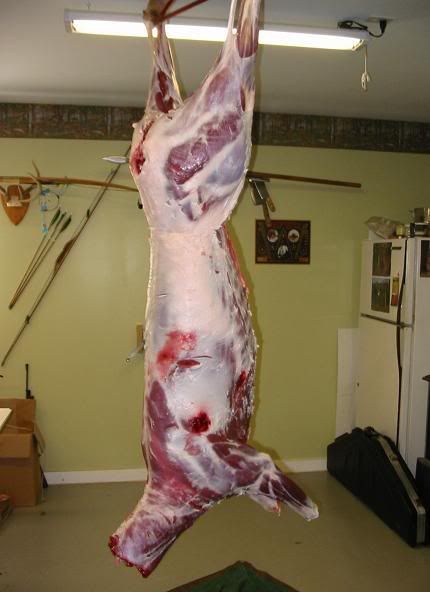
Step 12. Tell him to change the pair of rubber gloves he was wearing to remove the hide and get a fresh pair for working with the meat. Allow him to stand back and enjoy the fruits of his labor.

josh_skin92.jpg


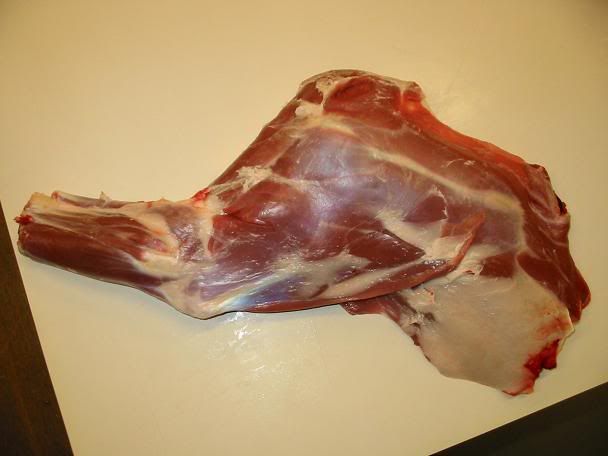
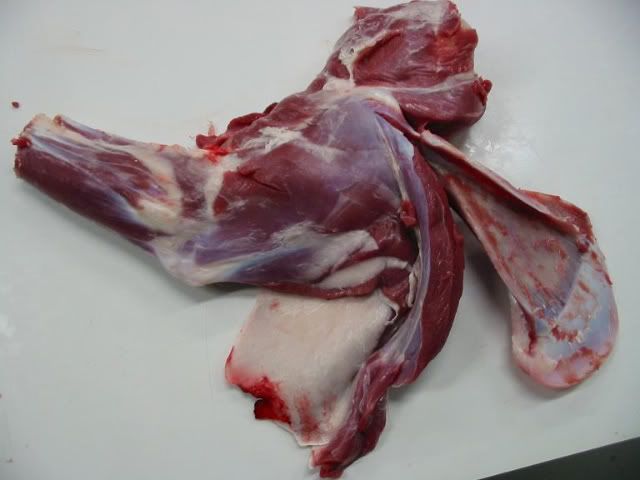
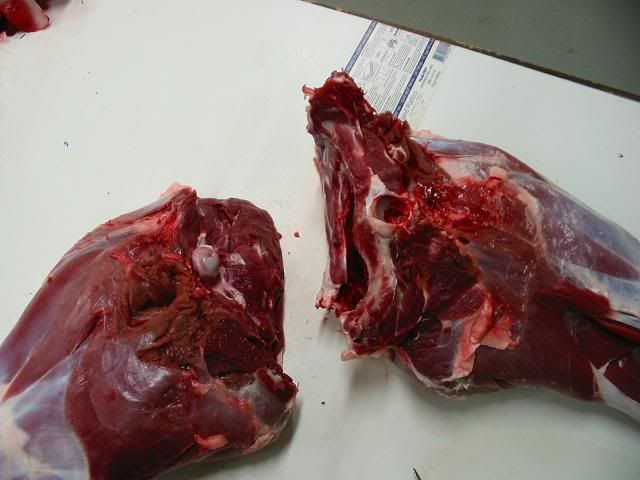
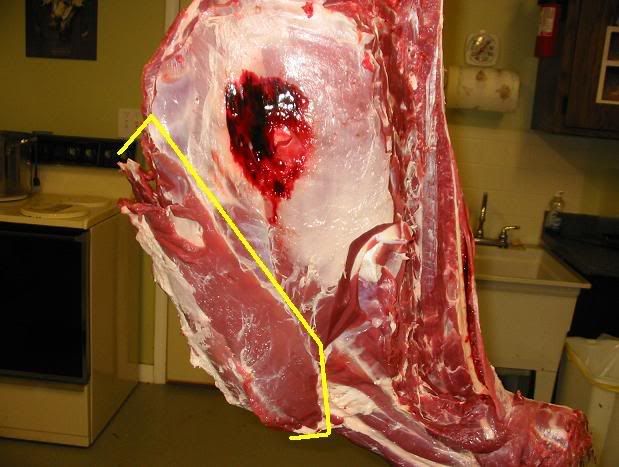
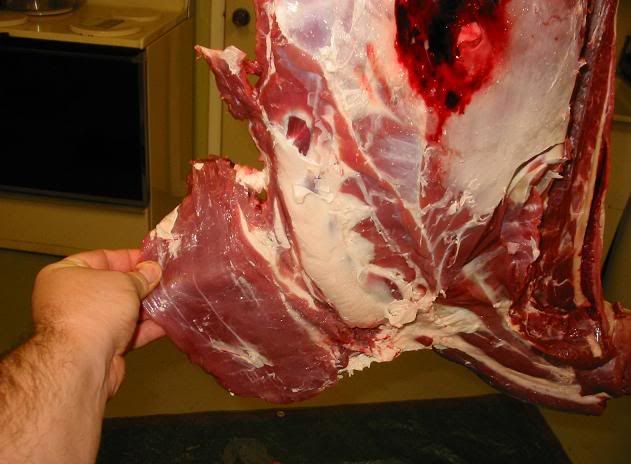
Step 13. Tell him that he still doesn't need the saw to remove the front shoulders because there is not boney joint and that the whole thing is held together by muscle. Then tell him he gets a second chance for more practice on the other front shoulder.

arrowdamage.jpg


Take the time to discuss arrow placement as you look at the front shoulder.

inpact_point.jpg


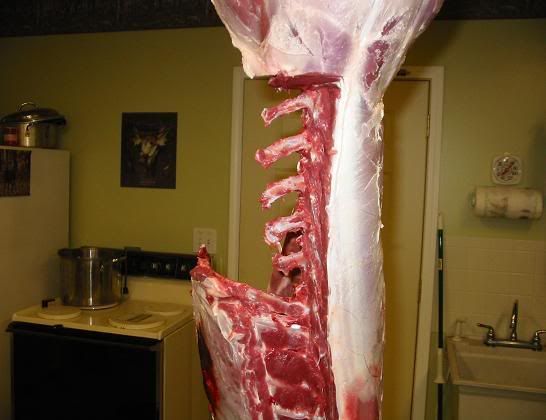
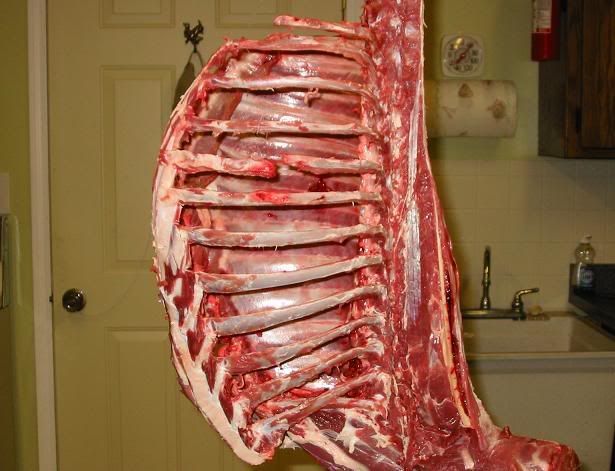
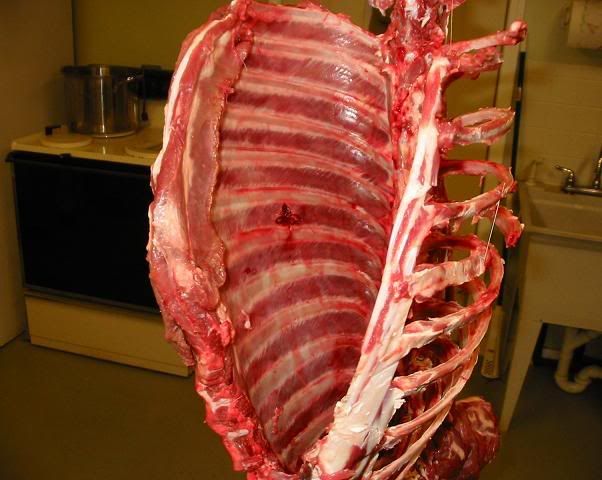
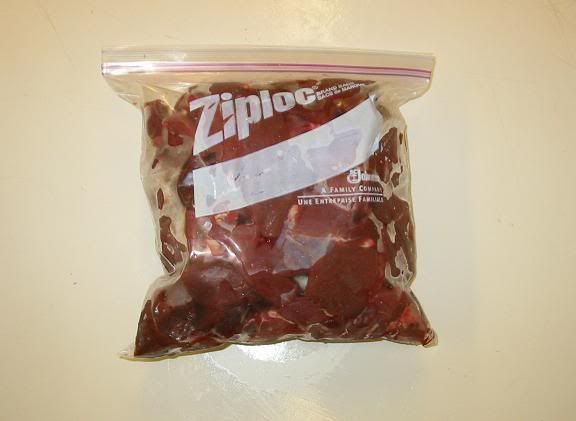
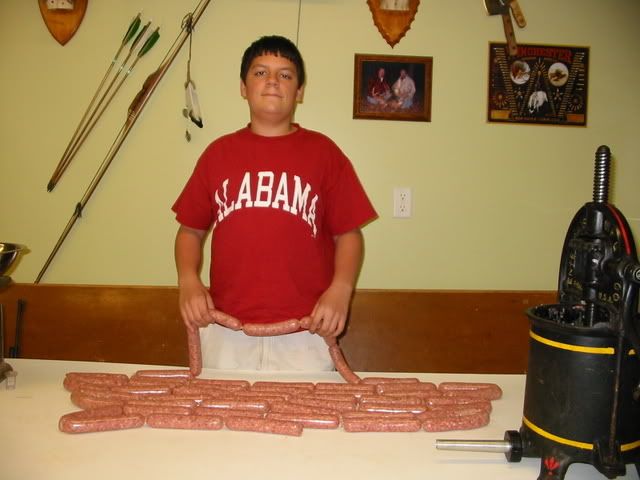
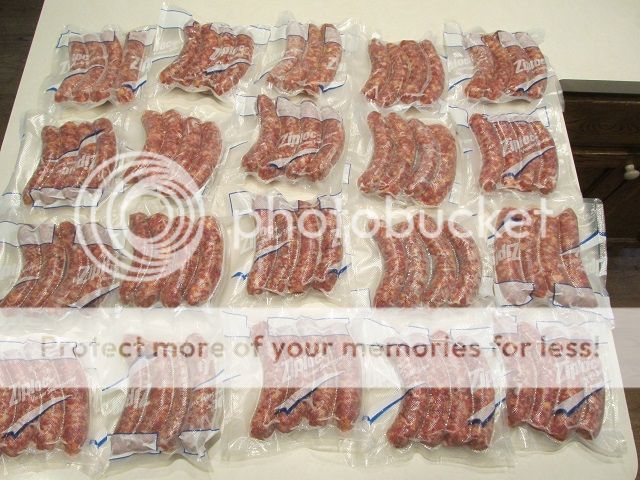
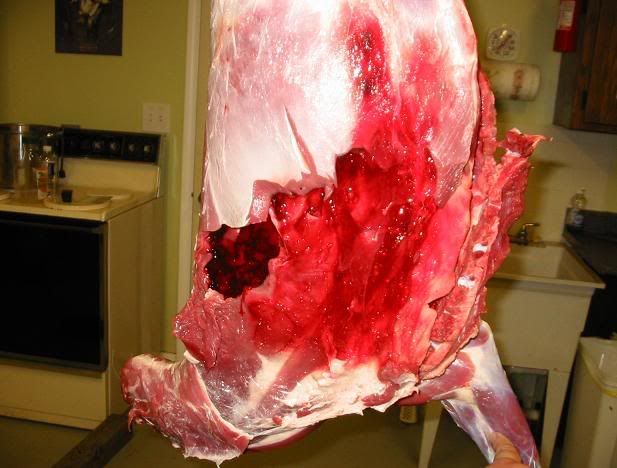
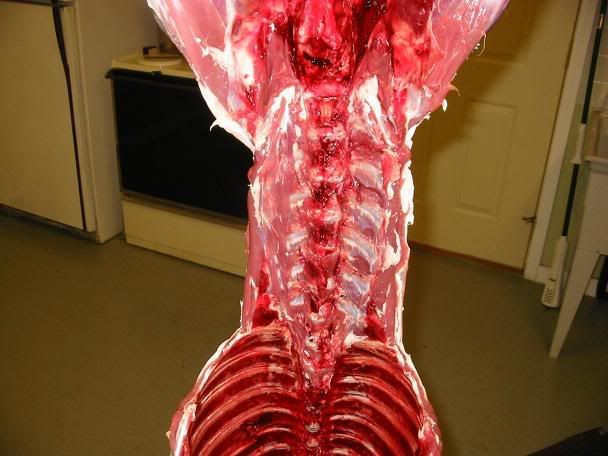
Step 14. Remind him how much he enjoys things like jerky and snack sticks so that he does not waste any of the trim meat on the brisket.

brisketbefore.jpg


brisketafter.jpg


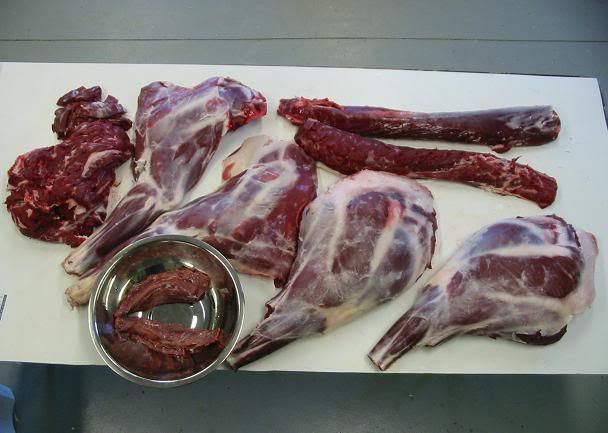
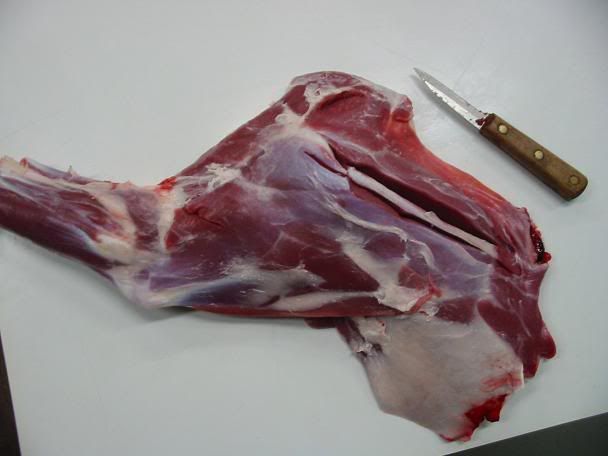
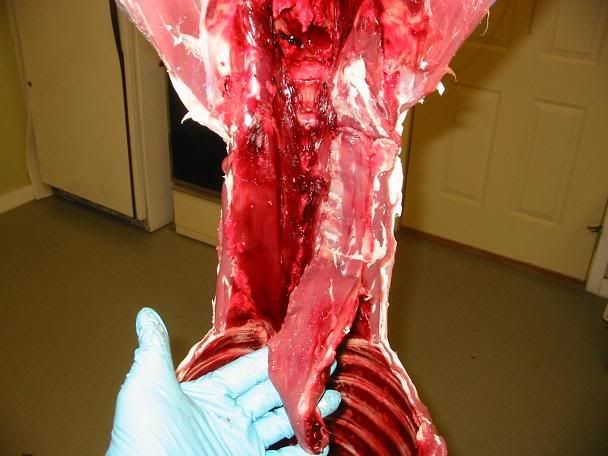
Step 15. Tell him all about the best and most tender part of the deer and why it is called: "The Tender Loin" Explain that there are two of them and that he need only make a cut at the top of the tenderloin and that he can remove them by simply pulling them off the side of the rib cage.

t_loin2.jpg


t_loin3.jpg


t_loins4.jpg


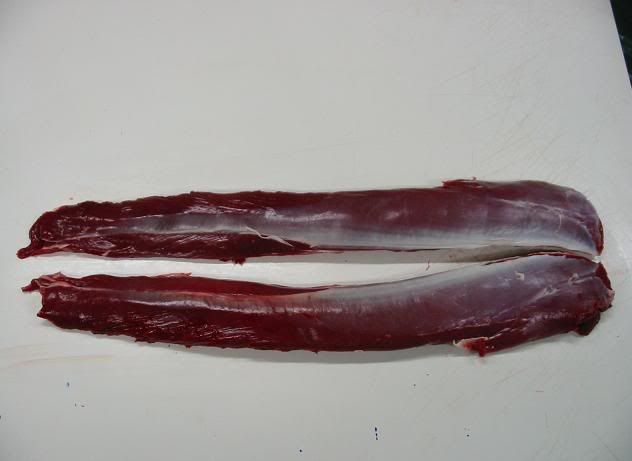
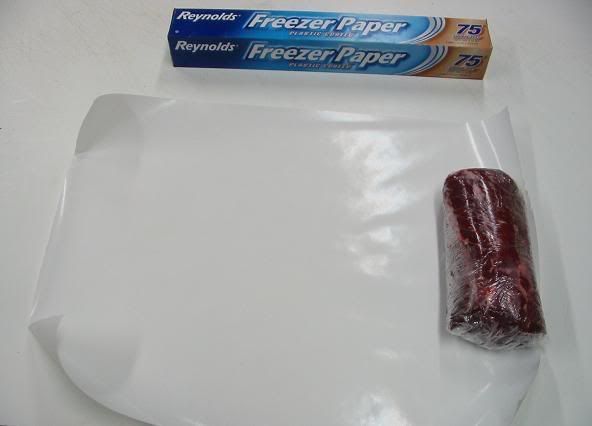
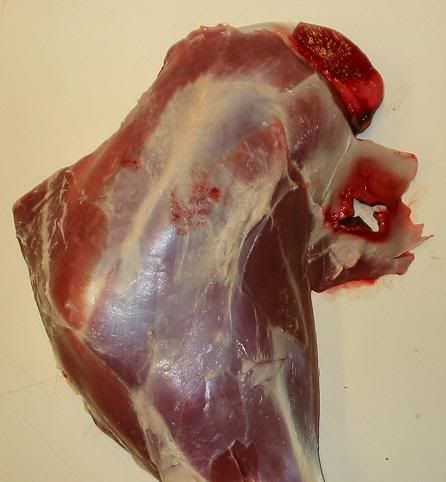
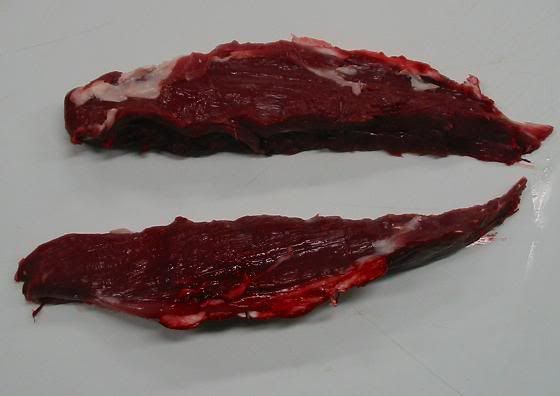
Show him what they look like after being removed. Remove any white fat before cooking. I prefer to remove them when I am gutting the deer (or very soon afterwards) If you don't get them out soon, the exposed areas will turn dark red/black due to drying out. If that happens, soak them in cold (ice) water and scrub them lightly to wash away any blood. DO NOT freeze tenderloins!! these are to be enjoyed as soon as possible. Freezing will make them less than tender-loins. Tell him to cook them until slightly pink in the center with onions and mushrooms.

t_loin1.jpg
 
Step 16. Tell him that next to the tenderloins that the loins are the next best cut of meat on a deer. Remind him that those tasty grilled loin chops that he likes so much come from the back of the deer and that there are two of them. One on each side of the backbone. Tell him to feel for the hip bone and cut just below it and the to run his knife right along the backbone until he hears the tip of the blade clicking as it passes over each rib. He can then massage the loins off the back with very little knife work..

beforeloins.jpg


beforeloins2.jpg


Step 17. With one loin removed, Explain shots taken from high in a treestand and what the bones look like. Show him the short ribs.

shortribs.jpg


Step 18. With both loins removed, lay them out and explain how it's best to leave the loins in large hunks when freezing to avoid freezer burn and that he can slice up steak after he thaws the large pieces. Tell him that leaving the silver skin on the loins will also protect them from freezer burn and it too can be removed before cooking.

loinswhole.jpg


Step 19. When he starts to complain about getting all the meat off from between the ribs, remind him again about the summer sausage and breakfast sausage and ask him where he thinks all that meat comes from. Kids love it when you do that.

ribs.jpg


Again, take the time to discuss anatomy and shot placement until he is thoroughly sick of hearing about it. A tip off will be when he says things like "Yeah! Ok I get it already"

ribs3.jpg


Step 20. With all the meat removed from the front half of the deer, remove the ribs and bag them for the garbage man. this leaves you with the hind quarters.

spine.jpg


Tell him that if he really wants to use the saw that this might be a good time.

hanginghindquarter2.jpg


Step 21. Remove the hind quarters from the gambrel and have him separate the hinds from the pelvis. Then lay all the meat out from him to see. Tell him that this is where the fun part begins. Tell him that he gets to debone the front and hind shoulders.

Quiz him and see if he can tall you that the meat on the far left is the meat off the neck and that the meat in the bowl are the tenderloins and that the long, slender cuts of meat are the two loins. He will be able to tell you that the rest of the the meat are the front and rear legs.

deer_cut_up.jpg


Tell him that he will get extra points for being able to identify all the trim pieces through the clear gallon sized Ziploc bags that you will be freezing them in.

jerky2_06.jpg


Step 22. Now that he is feeling confident in his knowledge of deer parts. Show him how the front legs work and what the bones look like. Tell him to look for the ridge bone that runs the length of the scapula.

frontshoulder4.jpg


And to run his knife on both sides of that bone.
frontshoulder3.jpg


Cut along the bone until you have exposed the entire scapula

frontshoulder5.jpg


Follow the leg bone and remove the rest of the meat. There is no wrong way to do this. This meat will end up in a grinder or made into stew or jerky. Tell him that this is a tough cut of meat as these muscles do a lot of work when he moves around too much in his stand or if the deer smell him.

frontshoulder2.jpg


Show him the three bones of the front leg. The blue object is a crude depiction of the heart. Tell him that the the leg bones do a pretty good job of protecting the heart but it still can be gotten to by correct shot placement. Tell him It is better to shoot a little high and he will still get both lungs and the top of the heart. Tell him that this is a deadly shot that will bring a deer down in very short order.

frontshoulder1.jpg


Step 23. Tell him that he is in the home stretch and that all that is left is the hind quarters. Tell him that the first thing to do is to lay the pair on the tail end and press on each hind quarter to see where the hip is. By spreading the hindquarters, he will see where to start. What he is looking for is the hip joint (ball and socket joint) No saws are needed for this operation and he only needs to cut the tendon in the ball joint to remove it from the pelvis.

hipjoint1.jpg


Tell him to follow the seams in the meat and cut along the pelvis bone until one half is removed.

hipjoint3.jpg


When he is done. he will have a de-boned pelvis with very little meat to trim off. Tell him that this trim will be used in those burgers or brats he enjoys on the grill.

hipjoint4.jpg


On the inside of the thigh he will be able to feel the thigh bone (femur). Cut around and remove the bone. This is the bone he is removing. The ball joint is on the upper right.

bone_C.jpg


Once deboned his hind quarter will look like this. This view is from the outside or hide side of the leg. The lines show him the cuts of meat that are in the hind quarter. If he were to leave the bone in the leg and saw across the whole hind quarter, he would have a "Whole Round Steak" Most folks don't do this with a deer and it is seen less and less in beef as well

hind_quarter2small-1.jpg
 
If he follows the natural seams in the muscle groups, he will be able to take each group out. Clean up any fat and he is left with cuts that can be sliced into steaks or used as roasts

hind_quarter1small-1.jpg


Tell him that after he has gone through so much work to process this fresh venison, you he want to make sure it will taste good even after it sits in our freezer for several months. Remind him that no meat is ever improved by freezing but that he can make the best of it by protecting his venison from the effects of freezer burn.

I prefer a vacuum sealer but not everybody has one. If you wrap your meat in butcher/freezer paper, it won't last long in your freezer. You need to use a heavy plastic wrap first. Wrap your meat in layers and press out as much air as you can. Start with a single layer of plastic wrap. Place the meat on the wrap and roll it up tightly. This will still leave the ends exposed it it is a large cut.

wrapped_meat6.jpg


Next, wrap the meat in another layer of plastic wrap but this time, turn the meat and wrap in the other direction. Fold over the plastic wrap to protect the previously exposed ends.
wrapped_meat5.jpg


While wrapping, squeeze out as much air as you can. You do not want a layer of air next to the meat. The plastic wrap should be in contact with the meat.
wrapped_meat4.jpg


Now that you have two layers of plastic wrap over the meat. Wrap the meat again in a good quality freezer paper that has a plastic coating on one side. Use enough so that when you are finished, you will have two layers of paper over the plastic wrap.

wrapped_meat3.jpg


While rolling/wrapping, make sure to tuck in and fold the ends to make a good seal. Again, make sure to squeeze out as much air as possible. Seal the paper with tape, Identify the cuts and the date and this meat should last six months in your freezer. I have come across a lost package or two in the bottom of my freezer that were a year old and they were just as good as the day he wrapped them.

wrapped_meat.jpg


Now with all the work finished, do not wait for him to thank you for the life lesson. He will do that many years later and completely out of the blue. Instead, take the time to tell him all about bacteria and germs and how a clean butchering area is very important and how cleaning up after yourself is a noble trait.

jerky_06.jpg
 
Good Stuff.

Here is a simple trick that some know but not many and you can do if the temperature allows.

Do not gut the deer. Hang it by the head and cut a ring around the neck near the head. Place a Golf Ball or a similar sized rock in the hide and make a “ball” of hide.

Attach to this ball with a rope. Attach other end to a tractor, truck or atv. Pull the rope.

The hide will turn Inside Out and come completely off of the deer if you have made cuts around the “knee” of each leg. Even the tail will come off leaving the bone.

Your deer body is completely hair free. Cut off the meat as you normally do with or without gutting. If you choose to gut simply place a 5-gallon bucket or pail under the deer before making the first cut.

You can do this in the field and simply quarter the deer and pack the parts in garbage bags to take home.

This works best with a Hot Body done soon after the harvest.

Try it and see if you like it.

I have a buddy who did this religiously with his lawn mower. Problem was that he lived in a subdivision in town. His neighbors would freak out!!!!
 
Excellent! Thank you for the well communicated and illustrated lesson! We’ve done it for years, but I still learned thing or two.
 
Then take him onto the next step.

IMG_7610.jpg


IMG_7618.jpg


brats97_zps09bfe3c3.jpg
Thanks Ron, for the time you put into doing this very well presented deer butchering seminar. And kudos to the nice clean butchering area. Processing your own deer is the crowning achievement of the dedicated do it all deer hunter. (and it saves a ton of money) I guess I always took deer butchering for granted after learning from dad, just like your son is right now. and never stopped to think that doing pictures might help others who might not have had the opportunity to be taught by their dad. I predict that your son will turn out to be a professional chef, hunter, and butcher. And that the two of you are having a great fun time getting there!
 
Back
Top